

Disclaimer: Alot will change on this page as we are always finding new and easier ways to do things. You can always bookmark it and come back to it anytime. Happy reading. If you prefer video versions, those links to our videos will be at bottom of page. We have a whole playlist on Gardening on our YouTube channel. Happy viewing too.
I have alot of pleasant memories of gardening with my grandparents. I can remember picking truck loads of corn and sitting on the tail gate shucking and cutting corn for days. Then I remember picking and shelling butter beans til I thought my fingers would fall off. I’ve dug my share of potatoes and snapped many beans too. While working in the garden my Pa Pa Oliver always said…"Don’t look at how much you’ve got left to go…look behind at how much you’ve already got done.” Wow, he has no idea how many times I repeat that to myself when working in the garden. It helps me every time. Thanks Pa Pa. I always said when I grew up, I wanted to have a garden, well, it has taken me plenty of years to accomplish this. When David and I first got married he was in the Marine Corp and it was hard to have a garden when you lived in base housing or an apartment in town, which we did both. I told him if we ever got our own land some day, I was going to have one, so here we are now. If you are not able to or have the space for a garden, seriously consider shopping at your farmers markets. You will not only provide your family with good healthy food, you will also be supporting growing locally. You can also Google container gardening to preserve space.


I am so glad to see more people putting in gardens. I choose to do this for more than just pleasure and memories of childhood, but for health purposes too. I choose to have a garden so I can provide healthy meals for my family. Now, some things I just can’t grow, because of a green thumb, but some things I can. My children do not like green beans from the store anymore since we grow our own and they’ve ate them for so long.


This is just my opinion, but “I” believe that alot of our diseases and cancers are coming from the chemical preservers that are put in our processed foods. My ancestors didn’t have many health problems, and it seems the more we try to “change” things the worse they get. Why can’t we leave good enough alone. Ok, I’ll get off my soap box now.


I’ll tell you the way I do some things and then I’ll share some ideas from others. Remember, alot of this is what I do and is my opinion. You use your own convictions concerning anything you do in your garden. No two gardeners rarely do anything alike. As we learn more things or find new things to try and they work, I will always update this page. It is fun to experiment and learn improved ways to do things.

You have to keep in mind of your zones that you live in and climates. Some things just don’t grow well in some climates and zones. I live in the south and we have good springs and summers. Although God can have other plans and we can have wet and floody or hot and drought seasons to where farmers and gardeners are forced to replant several times.

The only way I make it through the winter time, is by looking at seed catalogs and starting to plan and draw my garden on paper. This keeps my mind off the cold and the depression of not being able to get outside. Try it sometime, it really works. I don’t just get out there throwing seeds every where and expect them to come up. I plan first.


We will start by, in the fall, after every thing has been harvested and everything is dying, we will burn off and then disk up the ground, and let that settle for a while. In the winter if you have access to some manure, start throwing it on there and letting it decompose. If this is your first garden and you want to put one in, you will need to pick a good spot that drains well and does not flood. Have someone come and disk up the dirt in the spot you designate, or if it’s just a little spot you can get a rotto tiller and till it up. You can either get a jump start and do this in the fall or wait until the last frost of the season (spring) and then till it up. If you don’t have space for a big garden consider raised beds or container gardening, I’ll speak more on that later. Also, during the winter or early spring, I will throw out lime or fertilizer (whichever your soil needs to get started) to help the soil and we will periodically spray weed killer to help keep the weeds out. We have discovered this helps tremendously for keeping weeds under control in the summer. ( Do not apply any weed killer right before you plant, this needs to be done way before season so the rain will soak it far down into the ground and it want be so close to the seeds or roots of your plants.) Let the garden “rest” for a while. After the last frost, I will get my husband to disc the garden a couple of times before we start.
This is what our garden space use to look like. But as time went and health issues arose, we had to downsize alot.


What ever you do, only plant what you know you can handle, do not overwhelm yourself.. I have two strong boys and a good husband that helps me alot. If it were not for them sometimes, I would not be able to keep up trust me. Having Rheumatoid Arthritis limits me to what I can and can’t do. This is my tiller I got for Mothers Day one year. We taught our boys to use it when they were younger so they could help us. 

We use the tractor and disc for tilling and breaking the ground for the first time, but we use the tiller to keep in between the rows weed free. Some people use the no till method, but to me this helps aerate the soil. Air is essential in your soil. Your gonna need a good hoe too, to help weed in between plants where your tiller may not fit.


Let me go ahead and talk about raised beds and container gardening before I forget. Some older people have benefited from a raised bed to help with bending and can’t hardly manage getting up and down alot for picking. If you don’t have a lot of yard to give up to a good size garden this works well. All you do is just find anything like wood or cement blocks to make a square. Dakota made mine for me. Bless his little heart, I really appreciated them.

Fill them up with compost, like dirt, straw, grass clippings or leaves. 

Then start planting your plants or seeds of your choice in them. Simple things like leafy greens, radishes, carrots, spinach, garlic, etc. anything you don’t want to use up a whole row in, in your garden spot. 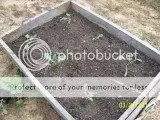
 The same method goes for container gardening. These are big to small pots you can put on your porch or deck for a small family or just two of you. I know some people who have incorporated things into their flower beds. Like, corn behind some low growing shrubs or flowers, now how cool is that? You can raise tomatoes and potatoes in five gallon buckets. My mother tried some tomato plants in 5 gallon buckets. It works quite nice. You can grow alot of things in 5 gallon buckets like peppers, tomatoes, potatoes, carrots etc. Most plants that grow in a bush form or that need deep soil for growing room like carrots and potatoes, do well in buckets.

 The same method goes for container gardening. These are big to small pots you can put on your porch or deck for a small family or just two of you. I know some people who have incorporated things into their flower beds. Like, corn behind some low growing shrubs or flowers, now how cool is that? You can raise tomatoes and potatoes in five gallon buckets. My mother tried some tomato plants in 5 gallon buckets. It works quite nice. You can grow alot of things in 5 gallon buckets like peppers, tomatoes, potatoes, carrots etc. Most plants that grow in a bush form or that need deep soil for growing room like carrots and potatoes, do well in buckets.
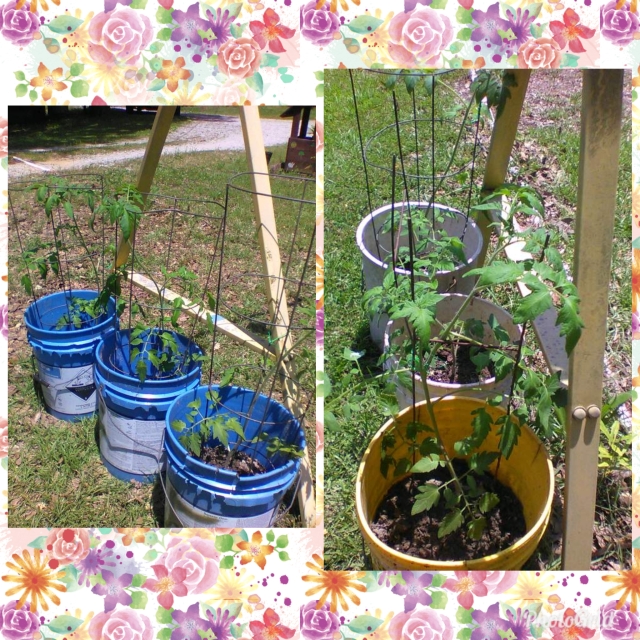

Lets talk about seeds. You can choose seeds or plants. If you have a green thumb, you can plant everything by seed. You can even start them indoors in winter using cups with soil in them or flats as they call them. I use both. I can’t grow tomato plants, broccoli, cauliflower, and cabbage from seed, I have to buy the plants. I’ve never had any luck. One year I did plant Broccoli, cabbage and peppers from seed and they did great. But I guess that was a one time thing because I haven’t had success after that. Lol. However, I will keep trying. Everything else I can plant from seed. Now, consider the kind of seeds you want. Once again, there is a controversy over this. You have heirloom, saved seed and the seeds you buy at Co-op. Yes, some of the seeds we buy are GMO( genetically modified). That means the seed has been injected with a herbicide or insecticide. Alot of people will choose an organic seed company because they don’t want all that “stuff”. To tell you the truth I have used both. Some things will grow better than others it just takes patience and knowledge. I bought some potato eyes from a seed catalog and I followed the directions and everything, out of three rows, I might have gotten two 5 gallon buckets. I was so disappointed. I tried different corn from the seeds catalog and they did not do as good, again, I was disappointed. It is strictly your preference as to where and from whom you purchase your seeds. You do what is best for you. Just remember to follow the directions on the packet. One thing to remember also when purchasing seeds, read to see if the plant will grow into a Bush, pole or vine. This will help you know what to plan for before you plant and where to plant. I will cover that later below. I’ve had to Google a few things myself.
I will post some tutorials below on how we plant certain things that have worked for us.
When I find some good information, I will copy it and put it in a binder. Also, try to stagger your planting times. Like one week, plant your green beans, the next or maybe two weeks later, plant your corn. This way everything is not coming in all at one time and it’s hard to keep up. Now, some things you do plant in different seasons. You’ve got your cold things like lettuces, spinach, carrots, broccoli, and cauliflower that can only tolerate cool weather, these need to be started in early spring so they will be harvested before the heat of summer gets to them. Any time you have any questions your co-op or seed supply store can help you with them. My co-op is so helpful and they never get tired of me asking questions or wanting to try new things.
.

Now, fertilizer. If you didn’t start fertilizing in the fall and winter, you can start fertilizing before you plant or after you plant the seeds. The only thing you have to be careful is to not get fertilizer directly on the plant or seeds. Fertilizer is strong and will burn plants and seeds. If you fertilize before you plant, try to do this right before a rain. If you do this after you have planted, just cast out using a fertilizer spreader from your local Co-op or feed supply store. When fertilizing plants, just spread a little around the base of the plant without touching the plant or any leaves. Fertilizing should be done before and when things start to bloom before they produce the fruit or vegetable. Its called “side dressing”. There is a big controversy over chemical and natural fertilizer. It is strictly your choice. If you choose natural, you can use manure. But what ever you do, let it sit for a while and decompose. Never throw fresh manure around or on plants. Chicken manure has the most nitrogen and can burn the plants. . I almost forgot, there is a difference in commercial fertilizers. My friends at my co-op explained them to me. 15-15-15 is called triple 15, it is equal parts Nitrogen, Potassium and Phosphorus (I think) lol. It is used on things that need to produce stalks or big leaves and grass. I use this just on my corn. Then I use 6-12-12 on anything that needs to produce a fruit or the actual vegetable. When I used this I saw a big difference. So find out from your co-op what is good for what you want to grow and what fertilizer you should use. Another good place to get good info. is your County Extension Office. They can do a soil sample test for you to tell you what your soil is missing in nutrients, and tell you what kind of soil you have and what would grow best there.


Making the rows and planting the seeds:
Plan before you plant. As I said above, know what grows in Bush, vine or pole form. This helps you know whether or not you want to plant in a row, or just spread out. I prefer alot of things in rows so I can have a nice walkway in between each row and we can till between. Also, if you plant in rows, it’s easier to spread fertilizer down the row. Also, some seeds are ground hardy and some do better planted in flats or small containers then transplanted to the garden after they have grown into a small plant.
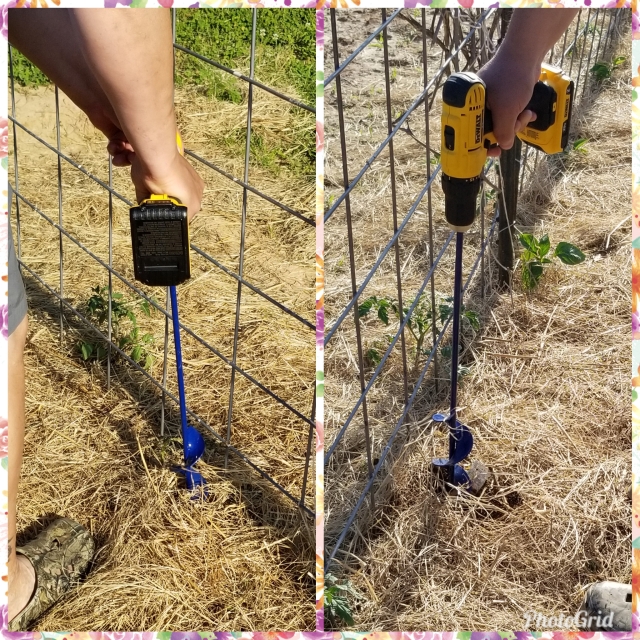
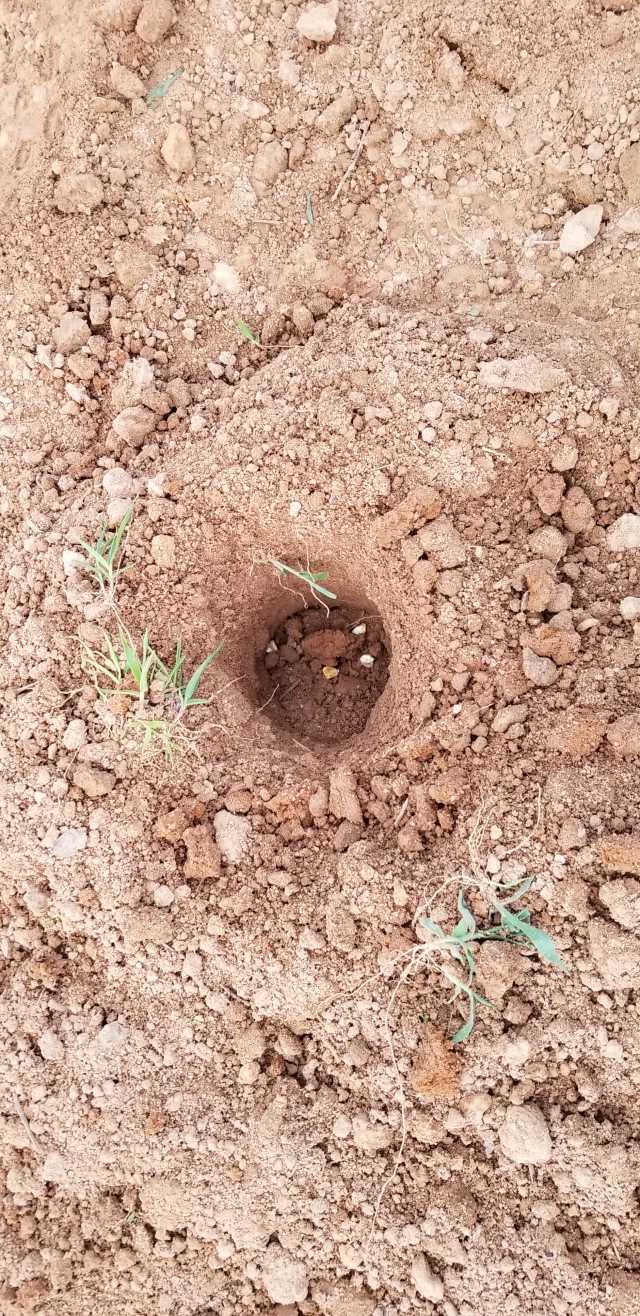
Making the rows: we have done this several ways. We have a tiller that has a little plow behind it to dig the row for you. Then we have done it the old fashioned way with a hoe or triangle hoe. You take your hoe and turn it on its side and scrape a trench down a straight line from begin to end where you want. This year, we tried a little nifty contraption. It is a small auger that attaches to the end of the drill and makes your holes. Not alot of wear and tear on your back. We used this with our corn and tomato and pepper plants. Note: when using this, we have to know how far down the hole needs to be according to what seed or plant we are planting.
Corn: grows in tall stalks. They are best planted in rows and the seeds spaced about a foot apart. Two to three seeds per ft. Pa Ingalls use to say, “One for the crows, two for us.” For some reason, crows just know when you plant corn. Then cover your row back with the dirt. Corn also needs good root establishment to support their weight. So dig the hole or trench about two to four inches deep.


Green beans: can be planted in a row using the trench method or holes. Just know wether or not they grow in Bush or pole. Pole means it starts out as a bush then the tops spread out into vines which will need to run up some kind of trellis or support. We have done this several ways also. You can use sticks and twine or string to make a fence like support or use some kind of fence. We love our idea of t-posts with our old cattle panels. You can save alot of space and get two rows out of this. Dig a trench or holes if you prefer on both sides of the fence. Space two or three seeds about a foot apart. Then cover back with dirt. When they start growing, check to make sure vines are crawling up the fence. High winds and heavy rains can cause them to go astray and start spreading across your row.


Potatoes: phew, potatoes can get complicated. People have done it the old way for years and now people are trying new ways. The old way is the furrow method. A furrow is a wide, deep ditch basically.

This takes alot of time and hard work. We did this first when we started growing potatoes. We then discovered that you can use post hole diggers and dig deep holes about a foot deep. The thing with potatoes is you have to “mound” them. This means periodically through the growing stage, you keep raking dirt up around the plant into a mound. Reason being, the potatoes try to start pushing up through the ground and if they are not kept covered by dirt, they will die. So you mound them.
Told ya that was alot of work. Now people have found different ways of growing them. They can be grown in buckets. You just put you some soil in the bottom of a bucket then place your seed potato. Cover with some more soil. Do not fill bucket up yet to the top with soil. You will use the mounding concept inside the bucket. As the plant grows keep placing soil in bucket to cover the roots and little potatoes. You will see what I’m talking about once this starts happening. Eventually your soil will get to the top of the bucket.
Now the “seed” of a potato comes from an “eye” on the potato. You can purchase seed potatoes from a company or you can try to use a store bought potato. Basically you cut a little chunk or quarter around an eye of a potato and use that as your seed. When you plant the chunk or quarter, make sure the eye is facing up. Then cover with dirt. Wholah!
Tomatoes:
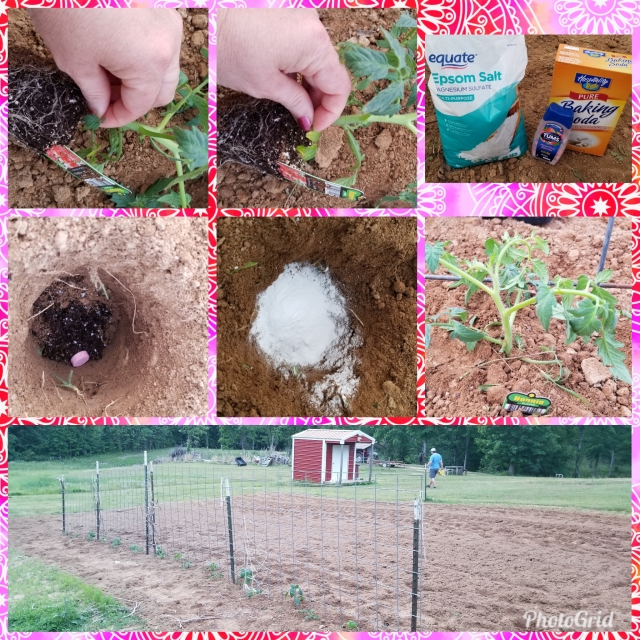
I love growing tomatoes and I have learned and experimented alot to get the best plants and most yield. We plant the plants, not seeds. Tomatoes love to be planted deep in order to establish a good root system. And space them about two to three feet apart. Dig your hole with shovel, post hole diggers or whatever. Remove the last few leaves off the bottom of the plant and plant pretty deep. You want to establish a good root system.

Then a few tricks is to add a couple of tablespoons of Epsom salt, a tablespoon of baking soda and a Tums tablet to the hole before I even put the plant in. These three together gives the plant the nutrients it needs and wards off fungus and diseases. The baking soda takes out alot of the acid and makes them a little sweeter. You can Google all this information and see what I mean. Then, I will snip off the last few stems and leaves at the base of the plant. I place it deep in the hole even if it covers a few leaves and stems. Then cover with dirt and pack it down around the base. Then we mulch the plants to retain moisture. You can use hay, wheat straw, mulch, etc. Whatever you have on hand. You can grow these in containers or buckets too.
Now, tomatoes have to be “staked” and tied. A stake is basically a vertical stick or post buried right next to the plant to have something to tie the branches to as the plant gets bigger. The reason you do this is because the branches are so thick and heavy, then you throw in the weight of the tomato as it grows, this causes the branches to break. Plus, you do not want any of the branches or leaves touching the ground. Tomatoes are the easiest plant to catch plant diseases like blossom end rot and other fungus’.
There are so many ways to stake and tie a tomato plant. We have even used the store bought cages before and even made our own cages. The problem we found was storing them after the season was a pain and alot got blew down in storms which broke and killed our plants. Now we use T- posts and cattle panels. I can plant on both sides of the fence and save space. As the plant grows, I gather the plant and run twine around it and tie it to the panel. Whoah! So much easier. During their growing season, you will need to tie them maybe two or three times. My plants get taller than me sometimes so I am tying 4 to 5 times.

During the growing season, you have to keep the suckers pinched off. If you allow the suckers to grow, they will steal the nutrients from the stem and branches that produces the fruit. You can actually take these suckers and place in the ground somewhere else or in a pot or container and grow a whole new plant. This is what suckers look like: they grow in the forks of the main stem and a branch in a 45 degree angle.

Half way through your growing season your tomato plants might look like this. They look kind of scraggly. Don't fret. You have to remember they just put all their energy producing their fruit. We had already been picking some tomatoes off these plants before we took these pictures. They will look like they are dying and browning but I have discovered that there are some things you can do to get maybe one more picking or at least help them produce new fruits and new growth up until your first frost. Now let me say this, we live in the South and our summers and warm weather can go well into late October or early November. So we can try to get as many as possible for our season. This is some things I do come this time of year. I try to keep all the dead leaves pruned off. This will help the nutrients get to the rest of the plant.


Now here is an idea with all those little suckers (no punn intended), do you see all those hairs on the suckers? Well, they actually create roots when you put them into the ground or into some soil. You can actually start a whole new plant. See those rough hairs at the end of this plant at the base. That's how tough they can get. They will eventually become roots.

I hope you enjoyed this information and hopefully you will play around and have fun in your garden. You never know what you might come up with.
Peppers:
Peppers, we plant the same way as we do our tomatoes. However, they do not need to be staked and tied. I also put a little Epsom salt in my holes before I put the plant in. We use the plants, not seeds. We space them about two feet apart. You can grow these in containers or buckets too.

Broccoli, Cauliflower, and Cabbage.
I buy plants for these. I was lucky enough to grow these in flats one year from seed. ONE YEAR. Maybe I will get lucky again one year and try again. You can plant these in a row using trench or hole method. One year I planted in a square and put three to a row. That worked pretty good too. These three have pretty thick stalks as they get bigger so they will need to be planted about three or four inches deep. Spacing these plants are pretty tricky because they grow and fan out as they get bigger. Cover back up with soil. This shows Broccoli, cauliflower and cabbage. See how they spread out like an umbrella? So estimate how far apart you need to space them. If you do plant them close together and kind of in a square in a raised bed or ground, they kind of shade the soil underneath them which helps cut down on weeds, however you can’t get in there with a hoe to weed. You will need to weed by hand. I’ve done both and both ways are ok for us. You guessed it, you can grow these in containers or buckets too.


.jpg)
The granddaughters were so excited this day as we walked through the garden and inspected everything. We were pleased with our little bounty.


Zucchini and squash:
I plant these from seed. I’ve always read and the instructions say you can plant in rows or hills. Plant two or three seeds one inch deep. A hill means, mound some dirt up in a circle and on the top of the mound make a little well as about an inch deep. Drop seeds and push dirt into hole. Talk about a plant that spaces out. Zucchini and squash plants can get huge, so spacing is important. I space my mounds about two feet apart. These plants can get as big as some elephant ears. They can also grow into monsters overnight. I am no exaggerating on that one. I can pick one day and go out the next and BAM!!!!! There will be a big one on there.


Cucumbers, watermelon, pumpkin and butternut squash:
I plant these from seed. All of these have running vines. You can plant these in a row or hill method. I plant them just like squash and zucchini. If you plant in a row or hill, you will need to watch them as they grow and keep the vines in the row in a straight line or they will sneak over to another row overnight. Yes, I have witnessed this. You can even plant these to where they can run up a trellis. The cucumbers are not so heavy that it will tear it down. I have never used the trellis method for any but for cucumbers that might be an option later. However, I would think that watermelons and pumpkins are too heavy.


Purple hull peas:
I plant these from seed. Some varieties have some running vines and some don’t. I plant them in row or trench method. I drop two to three seeds and space about a foot apart and cover row. If it is a vine kind, I keep the vines in the row to keep them from running across to another row. Sorry I don't have a pic. It has been years since we have planted peas. We have a family member who loves to grow them, so we swap vegetable for vegetable with them.
Spinach, lettuces, radishes and carrots:
I’m still experimenting with these. I plant these from seed. I’ve had so much trouble with carrots. I’ve tried rows in the ground, and raised beds. I’m just not doing something right. One year I’m going to try container. The secret to carrots is they need very loose soil so the roots can push down into the ground. I think our ground is too hard for carrots. I’ve had great luck with spinach, lettuce and radishes. I really prefer raised beds for these or containers. If my husband plants them, he puts them in the ground. Lol. Bless him. The key key to planting these seeds is the spreading method. We take a square spot and just spread the seeds. No counting or spacing apart. They also get spreaded shallow. Don’t bury them, but just spread soil on top of them. Viola!
Okra:
Okra are good seed size that is easily seen so you know how many you are spreading in a row. We do the same and dig a little trench and drop them into the row. I don't count seed spacing on this one I just go down the row like spreading salt on a dish. lol They get pretty tall too and are prickly just like squash and zucchini. Ouch!
I just want to show you what a difference two weeks can make.


Two Weeks Later:


See what can happen when you properly take care of what you are growing?
These are about all the things we have grown. Just remember to plan, research and read the directions on packet. Some seeds are ground hardy and some are sensitive and grow better in containers and then transplanted to the ground.
Watering is very essential. Try to plant before a rain, not a down pour that causes flooding. It can wash alot of your seeds away or drown them. I have had to replant several things before. But you will need to water if it has not rained for a while after you plant. Keep things watered during dry periods and droughts. This may make the water bill go up some, but I don’t mind, considering I don’t loose any food. My husband set me up a watering system with water hoses. Some people use an irrigation system. To me this is pretty cool. You can store rain water in barrels and use that to water with. Then sit back and start watching things grow. These are pics from our bigger garden years ago before we down sized.


We have also mulched to help keep things moist and cut down on weeds. We usually use hay. Some people have gotten creative and used plastic, feed sacks, newspapers, etc..

Now, lets discuss how to get rid of those pesky bugs. Once again, controversy. I have tried both. I have found chemical bug sprays to work best. It seems like every thing builds up a resistance to bug repellents. I do like Diatomaceous Earth, the food grade type. I have sprinkled this around my broccoli, cabbage etc. and it seems to work good. Something else we tried this year, is planting flowers and sunflowers around the garden to draw good bugs that eats bad bugs. It also draws honey bees for pollination.


.
We love sunflowers we even harvested them too for the kids to roast, flavor and eat. We also share with the birds. You can also take DE and put about a cup in a 5 gal sprayer and spray your plants. Just keep shaking the sprayer every once in a while to loosen the powder. You will need to spray for bugs more than just once, usually after every rain, cause it washes some off. I can just about tell you when its going to rain, WHEN I SPRAY! It never fails. I have even used wood ash too. Just sprinkle some around the base of the plant, not directly on the plant. We also use pure Neem Oil too. This helps with keeping June Beetles off too. They will eat your crops down if you are not watchful.


Now, weeding is necessary. You have to keep the weeds out or they will suffocate your plants and steal all the nutrients. You can use plastic sheeting between rows or feed sacks, newspapers, straw, leaves, etc. Something that will “cover” the row and suffocate the weeds. A good hoe is a must to get in between plants. I use my tiller between rows and it goes so much faster.
If you don’t weed, you will not harvest a thing. It is laborious work but I have found if you can get out in the evenings and hoe a little at a time it doesn’t get overwhelming. Try to do at least one row a day preferably in the cool of the morning or evening.
.

The second fertilizing that we do is when when the plants have grown a little and started producing flower blooms or buds and hasn’t produced the fruit or vegetable yet. The blooms or buds will eventually turn into the fruit or vegetable. This is called side dressing. Just sprinkle around base of the plant and don’t get any on the plant or leaves. You can broadcast down your row if you like, just don't get any on the plant. Just down the row where you walk.
Come summer, its time to start harvesting. The busiest time in the garden is picking and preparing everything. One year we had so many green beans it literally took us one whole weekend to pick, snap, wash and can. My dear husband helped me here, and we watched movies the whole weekend while doing this. Phew!!! Boy, were we younger then. lol
!


One year we had so much squash and zucchini, I didn’t know what to do. I was giving alot of it away until I finally learned how to use all that wonderful bounty up in recipes.
.


I love dill and sweet pickles. I’ve processed whole and sliced pickles. If I have a good year of cucumbers I will skip a year and plant something else in its place.
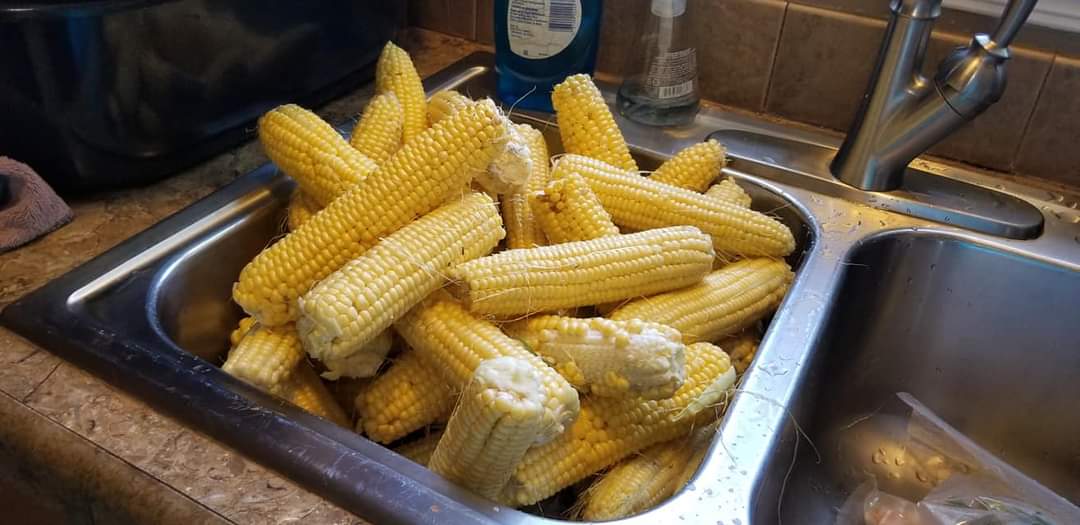
One year we had so much corn, it took all day one day to shuck, the next day we washed and silked, then when I just didn’t think I was going to finish, some family showed up to help me. I had never been so happy to see anybody in all my life. We finally got it all done and in the freezer. It took 3 days, but my freezer was full. Here is some of the pics. I love the one of Dakota falling over in the chair and Joe Joe watching him. We laughed so hard

.


I got a couple of good picking of peas one time, til the deer got in and ate the rest.
. My boys always helped in the garden and learned alot at different ages. Now I get to teach my grandchildren.
 My boys always helped in the garden and learned alot at different ages. Now I get to teach my grandchildren.
More great goodness:


Harvesting is tricky. You need to know when to pick. I know corn is ready to harvest when the silks turn brown. If you wait to long to pick they will start drying out. We learned that the hard way one year. Some things are easy to know when to pick like tomatoes, peppers, etc. Because you can see them. If it looks like it should if you were to buy it in the store, then pick it.
Now, things that are root vegetables and in the ground and you can’t see them are a different story. You can’t harvest potatoes until the hole plant starts turning yellow and dying out. Carrots, you just have to test. Take one green stalk and pull it and see what your carrot looks like. If it needs more time, just leave the rest. The same with radishes. My husband was the watermelon and pumpkin expert. He knew what to listen for when thumping them. Don't be scared if you squash or zucchini gets big. You can scoop out the seeds when you cut it open. I have a way I cut up both to use them into delicious meals.
Beans and peas, you want to feel and make sure you feel big seeds in the pods. Green beans are an exception. You don’t want humongous beans inside your green bean pod. Head lettuce and cabbage, just let the heads get big. You don’t want spinach leaves getting too big either. Like I said, store quality just grown in your back yard. Alot of seed packages will estimate a yield date, which means a date that should be ready for picking. If you test something and you don’t think it’s ready yet, let it go a few more days. Once you have harvested and preserved all your hard work, check for second pickings. I’ve had things keep growing all the way up to first frost. After everything has died out, take down fences or supports or trellises. Clean up and cut down and till into ground and let it compost itself. Unless you have a diseased plant. If you do have one or some, remove them, roots and all and get rid of them. You don’t want to contaminate the soil for the next year. You can actually plant some things for two seasons. Cold weather plants like lettuces, spinach, carrots, broccoli, cauliflower, and cabbage can be planted in early spring and late fall. Just make sure weather is cool enough. You can also learn how to save seeds from things and save money on seeds for the next year. Then do this whole process over again for next year. 

The last bit of info. I almost forgot. One year, plant things in specified places, the next year plant them in a different spot. This is called crop rotation. The reason for this is, one year you plant peas in one spot, they have alot of nitrogen. The next year you plant something else in that place, they will get the nitrogen from the soil from the previous year. Also, if there was any kind of disease the plants developed there that year, you don’t want to plant the same thing there again for fear of re-contaminating.

Then you have companion planting. This is where some things grow good together. Like the 3 sisters the Indians plant. Corn, green beans and squash. They will plant the corn and let it develop a little stalk, when the stalk is about 2 or 3 ft high, they will plant about 3 green bean seeds around the base of the stalk, the vines grow up the stalk as the stalk grows giving the vines support. Then outside around the green bean seeds, they will plant squash to bush out and shade the ground to keep the weeds down. The Indians knew what they were doing. I know that tomatoes love carrots. Some plants do not grow good next to something else. You can google companion gardening and find alot of info on the net, there is also lots of books.
.
Just experiment and play in your garden. It’s up to you what you make of it. But remember it is hard work. Always remember to keep the weeds out. If you let them in, you want have a garden for long. Recruit help. This is a great teaching opportunity for young children. I drive by alot of houses and appreciate the fact that they have planted a garden, however, it is ashamed they have not taken the time to tend it properly. Weeds took over and suffocated everything. It is ashamed. No one ever said gardening was going to be easy, it is laborous but the products are out of this world.

Just experiment and play in your garden. It’s up to you what you make of it. But remember it is hard work. Always remember to keep the weeds out. If you let them in, you want have a garden for long. Recruit help. This is a great teaching opportunity for young children. I drive by alot of houses and appreciate the fact that they have planted a garden, however, it is ashamed they have not taken the time to tend it properly. Weeds took over and suffocated everything. It is ashamed. No one ever said gardening was going to be easy, it is laborous but the products are out of this world.
Alot of kids today do not know where their food comes from they know momma or daddy gets it from the grocery store but that’s it. They have no clue as to how it got there. We’ve had Science class in our garden before. I am even teaching my grandchildren how to garden. I love making memories with them and teaching them how to grow their own food.


I hope you really enjoy your hard work and good efforts to try to put healthier food on the table and help with the grocery bill. You can refer to our Canning and Preserving Page to see how we put up and store our harvest for winter.
Check out a raised bed tutorial below too.


I told y’all I would do a tutorial for planting a raised bed to help y’all out. No, I’m not an expert flower gardener, however my husband has allowed me to play around with some bare space around our trees in our front yard so we can put some color around here and dress it up a bit.
First, do some planning and look at different kinds of edging to see what you like and how it could possibly look. We chose the cement edging because it’s low maintenance. Some wood rots and might have to be replaced, repainted or repaired after years. Make sure it can hold up to strong weather. Some of those little tiny fences are not strong enough.
Next, place your edging in the shape you want it. I chose a circle, yea, the hardest. Two layers high is fine because you want enough depth to plant bulbs or seeds that needs good root stability.
Then, fill with topsoil, potting mix or compost. You can do your own research and see which you want to do. Spread soil out evenly.
Last, comes the fun part. Planting your bulbs, seeds, or plants according to their proper directions. You will need to plan this out too ahead of time. Take into consideration the amount of sun or shade that particular area get. You have to plant according to full sun, partial shade or full shade. Sensitive shade plants will not thrive in full sun for example. Plan smart and play around.
I like to stagger according to seasons so each season something will be growing. For example, in the fall I planted early spring bulbs like hyacinth, and crocuses. Then behind that a late spring or early summer seed or bulb. Then a late summer followed by fall growing plants, like mums. There will be something for each season.
I like to stagger according to seasons so each season something will be growing. For example, in the fall I planted early spring bulbs like hyacinth, and crocuses. Then behind that a late spring or early summer seed or bulb. Then a late summer followed by fall growing plants, like mums. There will be something for each season.
This raised bed also works for your garden veggies too. It’s not limited to just flowers.
Hope you enjoy planning, playing and gardening at all the loveliness.
Check out our YouTube channel for more videos and content
I can link every single video, however it might be easier If I just link our playlist for you and you can save it.
I really hope you have enjoyed this page and have gained some insight and knowledge. Most of all I hope you grow the biggest garden ever and have overflowing bounty.
No comments:
Post a Comment