Disclaimer: Please keep in mind, this is how I do things when I am preserving our harvests. I just want to share my ideas, tips and tricks with you in hopes it might give you some inspiration of things to try.
I will list as many things as I can that I can, no pun intended. lol In other words, I will show you all the things I have canned and will continue to can and how I can them. I did it again didn't I? lol
Also, this is a written tutorial, however, we do have a YouTube channel and I have a playlist of all our Canning and Preserving videos. I will link each video I have in with the written tutorial too. Please note that this page will be updated frequently as we learn more things and make videos. Feel free to bookmark this page so you can visit it occasionally or if you can't read it all at one time, you can get back to us at your leisure. Scroll until you find something you want to try or a particular thing you are looking for.
This page might contain some affiliate links of all the items I use to preserve our harvests. Please feel free to click on them and find what you are looking for. They will be at the bottom of the page.
Whether you are harvesting your produce from your garden or you are shopping the sales and buying produce to stock your pantries or freezers, you need to come up with a plan as to how you are going to preserve all your bounty. There are so many ways to preserve food that I will try to cover them all. And that way, you can determine what fits your families needs and can plan a strategy from there. Maybe it would help if you watched the first video in our playlist first so you can see all the different ways to maybe help you understand and come up with a plan. You can watch it here:
First thing to do is know what kind of and how much space you have. If you don't have freezer space, then you know you might need to find a freezer on sale some where or try another preserving method. If you don't have shelf space, you might consider freezing. Let's jump into it shall we?
Pressure Canning:
First of all, let me stress to you: FOLLOW PRESSURE CANNER MANUFACTURER INSTRUCTIONS!
I can’t tell you how important this is. When you do this, you avoid many accidents and mistakes. I should follow my own advice sometimes. Just because I do mine one way doesn’t mean its always right. I would not want to jeopardize your safety. Pressure Canning is cooking food to a certain temperature to guard against botulism and bacteria. It cooks the food under "pressure". You will still need to cook your food when you open up a jar. When pressurized, the pressure creates a vacuum seal on your lids and bands. The seal is vital to keep your food from spoiling.
One of the most familiar sounds I could hear when I was growing up was the sound of my Grandmothers pressure canner. My grandparents grew a garden until finally their health just would not allow it. I can remember shelling butter beans until I thought my thumbs would fall off. We use to pick corn by the truck loads. All that shucking, shelling and picking, I wouldn't trade it for anything. This is my grandmothers pressure canner and it got handed down to me. I use it with pride and usually have to wipe a few tears every time I use it. The noise brings back memories.
Many years ago, my husband bought me my first pressure canner. I could remember how my grandmother used it and I got mine out proudly and here we go. Remember when I said I should have followed my own advice? Well, to my horror, I made the mistake of opening the lid before jars cooled down and saw there was no water in the bottom. So I thought I should just add a little water. Thank goodness the Lord was watching over me, because 7 jars blew up right in my face. Some how I managed to get out of the way, but they did not miss my ceiling, walls, kitchen counters, and floor. I was picking up green beans and picking out glass from my kitchen for weeks. Needless to say, I packed that sucker up and didn’t touch it again. I was scared to death of pressure canner.
Well, years went by and here I was gardening again. I really needed to use a pressure canner. All this stuff would not fit into a freezer. So, I asked my mother in law to re-teach me how to use a pressure canner. I went to her house one day and she was canning my favorite…green beans. It was really nothing to it she said. Humph! I thought, but after she walked me through the steps…turned out, it really wasn’t. She said those magic words, “Just follow the directions in the manual.” Well, there you have it people. lol She made it look so simple. And really, after doing it for so long, it is. I count it a joy to use mine all the time now. I’m so confident that I can run two at the same time with many prayers sent up. lol
I use my pressure canner year round. Even in the winter. Canning is not just for summer you know. There are some things we cannot grow. So if I buy some things when they are on sale, we will buy ALOT and I will bring it home and preserve it. Some things I freeze, some things I pressure can. Low acidic foods like beans, potatoes, carrots, corn, etc., get pressure canned.
I will walk you through a few simple steps. Let me also say that everyone has their own style of canning, from their set up to, how they pack the jars, to the finished product. You have to try different things until you find that pattern that suits you. As a beginner, people will try to tell you, "You can't pressure can that, it has to be water bathed!" or vice versa. They will give you their "opinions". Do not let people scare you or hinder you from wanting to try something. There are a lot of canning police out there but if there is something you want to try, by all means, try it. Do research, read, ask questions. It is your kitchen. If you are scared to get started or try something, grab a mentor. This is why I hope this information will help you in some way.
Before you start any canning project, you will need to wash and inspect all jars for nicks on the rim or any cracks anywhere on the jar. Nicks on the rim will keep the lids from sealing properly. Cracks in the jars will bust under pressure and you will loose all your contents inside the canner and it will be a big mess. Next, inspect all lids and bands. Believe it or not, I have opened a new box of lids and checked the rubber seals to find a nick in them or some kind of imperfection. Do not use those if you are needing something to seal. Bands can be reused for a long time until they start turning rusty or loosing shape.
Next, you need to wash, dry and inspect your canner and its rubber seal to make sure it is not dry rotting or cracked in any way. Check the vent hole in the lid for any debris. These steps are important especially if you have had your canner stored for the winter. Inspecting all my equipment first, cuts down on accidents that may happen. I prefer to lubricate my seal with oil after washing and drying before I use it. This helps the seal swell up to create a tighter vacuum once the canner comes up to pressure.
On my big canning day, I will get a work station ready and an assembly line prepared. Here is where it can get tricky. You will need to know if you are going to be cold packing or hot packing. What I mean by this is, there is the cold pack and the hot pack method. Cold pack is when you put the produce in your jars washed and raw. Hot pack is when you blanche your produce and then put into jars. Blanche is when you just boil or cook your produce a little in a pot on the stove. I like the cold pack method myself, this cuts out a step and goes faster for me. If you are hot packing, take into consideration, your jars and lids need to be kept warm until you get ready to fill the jars. Reason being, you do not want to put hot contents into cool jars, they might crack. You can do this by placing your jars into the oven with the light on or on a keep warm setting. You can place your lids into a pot with water on the stove eye and simmer to heat them up. Have them within easy reach when you are ready to fill your jars. Please use caution when handling either of these when they are warm and use the magnet lid wand, and mittens or a towel to keep from burning yourself. If you are cold packing, just have your cool jars and lids within reach ready to be filled.
You need to be familiar with how your canner needs to be set up. Each manufacture is different. It will tell you in your manual how much water to put into the bottom of the canner, then the rack. If you are cold packing, the water can be cool or room temp. If you are hot packing, the water needs to be warming up. Keep this in mind, your produce, jars, lids and water in the canner, all need to match. You do not want to place a hot jar into cold water in the canner because it can bust. Just think, hot hot hot, cold cold cold. Does that help? I hope so.
Now, let's start filling those jars. After produce has been prepped and ready, I start filling my jars with the produce to about the neck, do not fill all the way to the top. Add water if its things like green beans, peas, beans, etc. up to the neck. If its sauces, then fill jars with liquid to about the neck also. Make sure to de-bubble the jars. This means to remove any air bubbles that may be in the jar that can harbor bacteria that will cause botulism. You can do this by taking a stick, butter knife or a de-bubbling tool, and running it down along the inside of the jar and shift the contents around slightly to release these bubbles. You might have to add just a tad bit of water back in the jar, up to the neck, when the bubbles are released and contents settle. Next, wipe the rims of the jars off to make sure there is no food on them. Then place the lids on and then the bands. Screw on just fingertip tight until you feel the resistance, then just a tad more. Do not screw on too tight, this will cause buckling of the lids. Wipe your jars off really good. Set aside until you have all jars filled and ready.
Time to load your canner:
Your manual will tell you how many jars will fit into the canner and how to place them in there properly. Do not crowd them. Then carefully put the lid on and by all means, make sure its locked good. Turn the eye on. You will then start to see steam come out the little spout (vent hole) on the top. Let this come to a steady, continuous stream for 10 minutes. This is called "venting". This pushes all the air out. Then place the bobbler on top according to the lbs. of pressure that is called for the produce you are canning. For ex., my green beans need 10 lbs. of pressure for 45 minutes for my altitude. I will put the bobbler on my canner in the 10 lb. hole. Make sure you follow the lbs./per minutes in your book. When the bobbler starts making a jiggling noise, then you start timing. That means it has reached the desired pressure. You don’t start timing until you hear or see the bobbler jiggling. You have to let it get to the lbs. of pressure first. Then start timing. Time for the minutes indicated. Then turn off eye or move canner carefully to the side if you need to keep the eye on for another canner. “UNDER NO CIRCUMSTANCES, DO YOU OPEN A CANNER UNTIL IT IS COOLED AND DEPRESSURIZED" please. That is a good way to blow the lid off and burn yourself really badly. NEVER REACH IN AND JUST GRAB JARS. Get a towel or a jar lifter and lift the jars out and set them on the counter to finish cooling and seal. When you hear “pops” your jars have sealed. You can check the seal on your jars by tapping them. You will hear a sound difference in a jar that is sealed and a jar that is not. The sealed jar will kind of make a thud sound, the jar that is not sealed will kind of echo or sound hollow. I know that may not make sense at first; but once you learn to listen for the difference then you will understand.
Some canners have the lb. gauge on top. This is easier since you can “see” if it has reached the pressure limit or not, you will need to monitor it and keep checking it to make sure it stays the same. If the pressure goes over what you need, then just cut the eye down to med. or something to reduce the heat. This is the one dear hubby bought me years ago.
I told you it was pretty simple, but you still need to follow the manual. Sometimes I take shortcuts but that's only because I've done it so many times. Until you get into this routine, don’t try that. The more you can, the better you will get. Trust me.
Water Bathing:
High acidic foods such as tomatoes, sauces, fruits, jams, jellies and pickles, need to be water bathed. This method is easy. Water bathing boils to a certain temperature, it should be the highest boiling point of water. You can purchase a hanging thermometer that clips to the side of the canner for this if you need to so you can monitor it. The water in the canner boils at a certain temperature to bring contents of jars to a certain temperature to kill off any bacteria that may cause botulism.
You can follow the same procedures for prepping your produce, and preparing your work station as stated for pressure canning. Refer back to the instructions under Pressure Canning.
You prepare the jars the same way as you would for pressure canning. Put the jars in the water bath canner and cover jars completely with water, about an inch or two over the jar lids. Turn the eye on, bring water to a rolling boil and process for the minutes indicated in the manual or for the minutes for your altitude. You can research this information on the internet. Do not start timing until the water comes to a rolling boil. If the water starts to evaporate during the process and go below the jar lids, you will need to add more "hot" water. Do not add room temp or cold water. This will cause the temperature of the water to go down and loose its boiling point. Keep this steady until the process is complete.
When process is complete, take a jar lifter and carefully lift jars out of the water, and place onto a surface to start the cooling down process. After a bit, you should start hearing all those wonderful pops.
Whether you are pressure canning or water bathing, sometimes you will have jars that will not seal. This could be due to faulty lids or jars, etc. It is ok to repeat the processing procedure. It's called reprocess. If you do not want to reprocess or don't have time, after cooling, you can put the jars into the refrigerator and process at a later time or eat that jar first.
This is a water bath canner that I have that was passed down to me (the one on the right). I also use a stock pot sometimes if it is a small batch of just one to three jars (on the left). If you use a stock pot, just make sure you place something in the bottom of the pot to make sure the jars are not sitting so close to the stove burner. If the jars get too hot, they can bust. There are racks you can get to go on the bottom of the pots that have handles to lift out.
When storing your canners, put in a cool dry place if you have room in your cabinets. As for me, I have to pack them into a box and seal it up and put them somewhere. I don’t have enough cabinet space yet. You can also use your canners to can any time of the year. If you can’t grow something, go buy it in bulk and have a canning day. You could do this in the winter time to help heat the home.
Now that you have some kind of idea of each process and how they work; you need to decide which one you will want to do or if you are like me, just do both. You will need to start purchasing your equipment and supplies. Research what kind of canners you want. It is better to purchase these things in the off season. In the prime of the season, they will be higher in price. You can find canners anywhere these days. It is great if you can receive hand me downs, or locate some for sale by an individual on the internet, yard sales or thrift stores. Just make sure to inspect them carefully. You can take them to your local county extension office and they can help. There are many places to purchase jars. I also save jars like pasta sauce, alfredo sauce, salsa, pickles, and enchilada sauce jars. I use them for water bath purposes only. I have never pressure canned with them. I have family members who save me jars also. This is a great way to start a stash. Thrift stores and yard sales are a good place to start also for jars. Remember to inspect them no matter where you get them. Lids and bands are sold everywhere too. Buy these new. You do not want to take chances on these. You need a good little kit that has the jar lifter, de-bubbler, lid magnet wand and funnel if possible.
This is all my stashes. I do have more jars, I just took a pic of a few and different kinds I have.
You are also going to need some good books to refer to. Here are the ones I have.
Storing and Maintenance:
When your canner is not in use and you put it away for the season, wash the canner really good in hot soapy water, rinse and let air dry. Be sure to oil the seal a little to keep it lubricated so it doesn't dry out. Store in a cabinet or closet. If you are storing it in a storage building, put in a plastic trash bag or a box keeping dust and etc. away. When it is time to use them again, repeat the process but also inspect the vent hole and weight to make sure there is no debris on them and they are clean. I also oil the seal again before I use it for the first time. I will do this after every two or three uses. As you oil the seal, inspect for dryness or cracks. A dry, cracked seal will not swell up and create the vacuum that is needed to create pressure. If any parts need to be replaced, be sure to buy them quickly before all that wonderful produce starts coming in.
If you have ever thought of getting into canning but just a little scared to, I have a video for you that explains on a beginner level how to get started, what you will need, all the way to how to take care of and store your canners, it also debunks some myths and should make you feel more comfortable. Click the video below to watch. Written disclaimers will be at the bottom of the page.
Freezing:
Whether you grow your own produce or you shop the sales and stock up, using the vacuum seal method is a great way to preserve food. I love, love, love my food saver that wonderful hubby bought for us.
We got tired of working so hard and putting things in freezer bags just to get freezer burnt. So now, we don’t have that problem. It creates that vacuum tight seal that keeps air from getting into the bag and causing freezer burn. This system works great on all kinds of meats and vegetables. We've had vegetables and meats to last for over a year using this system. Vacuum sealers come in all different sizes. We have a larger one for big portions of meats such as whole big hams, big Boston butts, and big cuts of venison that we harvest and process. Some vacuum sealers come with accessories that you can vacuum seal things into jars such as dried goods like beans and flours.
Most vacuum seal bags are steam-able, which means you can steam vegetables in them in the microwave. You simply cut a small hole or slit in the bag and place in the microwave for up to three minutes. You can also place the bag and contents into a pot of water and boil on the stove. We have used these bags to cook things in our sous vide machine. These two methods do not require cutting a hole in the bag. When ready to take the contents out of the bag; just cut along the bottom of the seal line. You can actually reuse the bags. We only reuse the ones that have had vegetables in them, not meats. They wash very easily and go onto a drying rack to air out. We reuse ours until there is no more room to place any contents in them. You know, more bang for your buck.
Look at all the fun stuff we put in the freezer.
We used that vacuum sealer so much for so many years, we needed to upgrade to a bigger horse power to handle bigger cuts of meats. This is the one we have now.
Here is a video version of how we use our vacuum sealer
Dehydrating:
Another way to preserve food is to dehydrate it. We love to use our dehydrator to make deer jerky and summer sausage. Dear Hubby is good at this. This is only a few things we do with ours but you can dehydrate meats, vegetables and herbs. You can even make fruit leathers.
These pics are an example on one of our YouTube videos.
Here is one of his videos:
Now, let's start showing you how I do some of these wonderful things.
Squash and Zucchini:
Let's start with two of the easiest things to grow and preserve. These two vegetables are so versatile and just go good together. These are a staple in our freezer. These are so easy and grow so well that you will have an over abundance. I see so many people saying, "I've got squash and zucchini coming out of my ears and I'm having to give it away!" Oh my, unless you are just being kind, by all means, share, but don't feel like you have to "get rid of it" because you don't know what to do with it. I also hear so many people say they don't like the taste or texture after it has been frozen and cooked. Let me say this, anytime a vegetable or fruit is frozen, it is not going to have the same taste and texture as it would if it was to remain fresh. You just have to get creative. Some people pressure can or water bath their squash and zucchini.
There are two ways to combat the bitter flavor. The first one is to blanche your vegetables for three minutes in boiling water, dip in cold water to stop the cooking process, lay out on a baking sheet to dry or pat dry, flash freeze, remove from freezer, bag them up, then put back into the freezer. Phew!!
I have flash frozen some before, but I didn't blanche them first. I learned a quicker way take care of that bitter taste on the other end of the process. Let me explain.
You see, we vacuum seal our produce (in the raw state) in vacuum seal bags which are also steam-able in the microwave. This is how I get rid of that bitter taste. I thaw out a bag I'm going to use in a recipe, open the bag a little, squeeze out all the water, steam in the microwave for 2 to 3 minutes, squeeze out any remaining water and use accordingly. If any has gotten out of shape by the squeezing, I just reshape it. Simple. Squash and Zucchini can be used as a substitute in keto and diabetic diets. There are tons of recipes out there with creative ways of using these highly nutritious vegetables.
Now, here is the part I love and hope will help you. I cut up my squash and zucchini so many different ways according to how I'm going to use them in a recipe. For example, I cut cubes for stir frying or for tossing into a pan with some onion and potatoes to fry. Then I cut rounds for deep frying, au gratin, scalloped, veggie burgers, grilling, roasting, etc. I have even cut zucchini into long sheets horizontally to substitute for sheets of lasagna for a KETO lasagna dish, or zucchini boats, mini pizzas for keto instead of the pizza dough. There are so many creative ways to use these vegetables, the possibilities are endless. You can even ferment and pickle. I also shred them to sneak into things such as chaffles that my grandchildren love. Soups, stews, casseroles, etc. Our grandchildren love helping cut up squash and zucchini. It is so easy for them and it teaches them culinary skills, not to mention, hand mobility and eye coordination.
After all that chopping, slicing and dicing, we put into vacuum seal bags and place into our freezer.
I have two videos that I can show you how to process these two wonderful vegetables so you will have more dishes to add to your recipe collection. This is how I cut up mine for so many dishes. I hope you learn to enjoy these as much as I do.
I wanted to try Pickling Zucchini so I finally did it. This is another way to use up some of the Zucchini coming in from your garden. You can utilize a vegetable you already have on hand and save the space you were going to plant those cucumbers and now plant something else. It's all about ingenuity. Here is a written tutorial for you.
First, pick your Zucchini (small ones are the best). Wash them real good especially if you use an insecticide. Next, cut your Zucchini into wedges, rounds or you can do them whole. Then pack your jars tight but not so tight that you can't easily get one out. Wide mouth jars are best in order to get them out without breaking or smooshing them. Next, prepare your brine. I use Ms. Wages Kosher Seasoning packet. And I'll tell you why. I'm doing these pickles for my grandchildren and I want the closest flavor to store bought pickles as possible. You know the old saying, "if it ain't broke, don't fix it" If I start mixing my own spices together and yada yada, I may mess the taste up and you know kids, "I don't like this" So, Ms. Wages is the closest seasonings I can get and Lord knows I am not going to mess this up. I'm trying to get more vegetables in them you know. They love pickled okra. Imagine that.
Following the mixing directions on the back of the packet, bring brine to a boil and boil it for the required time. Next, ladle brine into jars and leave a one inch head space. Wipe rims of jars with vinegar or water (your preference) to make sure nothing interferes with the seal. Apply lids and bands (rings) finger tip tight. Don't screw on to tight. This causes buckling. Process in the water bath. This is where I tweaked a step just a bit. I have never used pickle crisp so I don't want mushy pickles. I cut the processing time in half. The longer you process pickles the softer they get. Remove from the pot after processing with jar lifters and set aside to let contents cool. If sealed properly, you will start hearing pops. Let sit for several hours. Test the top of the jars later to test for sealing. Then store in your pantry.
Here is an idea to get quick pickle anything. Save the pickle juice from store bought pickles. You can add peeled hard boiled eggs, cucumbers, Zucchini, radishes, cauliflower, basically anything you want to pickle. Put in the jar of juice, and store back in the fridge. Let sit for about 7 days. Instant refrigerator pickled anything on a whim.
Here is the video version of my Zucchini Pickles.
I tried an experiment using surplus Zucchini. I found another way to put our Zucchini to use and have a little extra treat on hand.
I made Mock Pineapple with just a few simple ingredients.
This is a way to use up some surplus Zucchini you have and to use when some of them get so big. 😉 Also, you have something extra on hand to make meals and desserts out of. So many uses from one vegetable, it is amazing.
Mock Pineapple:
So I took a couple of Zucchini that was big and peeled the skins off, then sliced in half lengthwise. I scooped all the seeds out. Then I cubed the flesh. I raw packed into jars and just covered with pineapple juice and some brown sugar. De-bubbled, wiped the rims of the jars off, placed lids and rings on fingertip tight and processed in a water bath for about 8 to 10 minutes because I did not want them to turn mushy. It was long enough to seal all the jars. My Momma loved every single one I made for her and my Daddy.
Here is the video version
Fermenting:
SAUERKRAUT:
Here is one way to make homemade sauerkraut. I got this method from the West Ladies at Homestead Blessings. They have wonderful how to dvd's. There are so many ways you can prepare sauerkraut. The possibilities are endless. Just do your own research and find the method and recipe that is appealing to you and go with it. If you don't like it when you open a jar, you can always tweak it and find a new method or recipe. Just have fun in the journey.
Step one: take cabbage head and cut it up however you want to. Whether it be with a knife and cutting board or in your food processor. I preferred my food processor or my hands would have been killing me.
Transfer to a bigger container.
Step 2: Add salt to draw out the water and to help give it that sour flavor of sauerkraut and to help ferment it. With clean hands, thoroughly squeeze the cabbage until it will start making water. Seriously, squeeze the juice out of it. lol or after you mix the salt in, and stir it up, you can leave it out on the counter to sit until it draws out moisture on its own. Do a taste test to see how much salt to your liking.
Step 3: Using a food funnel, start packing your jars.
Step 4: Take your fingers and tightly pack and push down as much down as you can in your jars. Leave a one inch head space in your jar because as the cabbage ferments it will foam and rise to top. If you do not have enough liquid you can boil up just a little more water with some salt and finish filling jars to neck.
Step 5: Then make sure around jar mouth is clean and put your lids on fingertip tight. Store jars in cool dark place to ferment for several weeks. Fermenting takes time and the longer it sits the better the flavor. Every day you might want to take lids off and skim off foam and keep the top of the kraut clean. Replace lids.
You can actually can this after the fermentation process is complete if you want a more stable shelf life. It will loose some of the probiotics from the fermentation process but it will still have some. You water bath it for 30 minutes. That's all. Then store back into pantry. Here is some I canned.
A few years later, we grew a lot of purple and green cabbage on purpose so I could make sauerkraut again. However, I didn't have any crocks to ferment in. So I researched other methods and came up with a way that I could use what I had on hand. I grabbed gallon glass jars, a dowel for pounding, and Ziploc bags. Yep.
This was my method:
I started by coring and cutting up all of my cabbage heads about thumbnail size. I placed the cabbage into the jars a little at a time, added a tsp. of salt, and used my dowel to pound down the cabbage until it started releasing its moisture. I repeated this process, layer upon layer, until I eventually got to the top of the jar. You want to make sure water is covering the cabbage. Will your arm be sore? YOU BETCHA!
In order to keep the cabbage under water, you need a cover of some sort that will fit down into the vessel you are using. If you are using a wide mouth crock, a plate or saucer will be fine for this. As long as you can get it through the mouth of the crock and it covers the cabbage completely. Next, you need a weight to hold the plate or saucer down. You can use anything heavy to hold it down.
I had to get creative with this seeings though I was using gallon jars with small mouths and a saucer or plate would not fit down in the mouth of the jar. In comes the reason for the Ziploc bag. I used this for my cover and weight. I filled the bag half way with water, removed most of the air I could, then sealed the bag tight. I started pressing the bag down into the mouth of the jar keeping close to the sides of the jar. You want to make sure the bag of water is pressed all the way down , covering the cabbage, and touching all areas of the inside of the jar. You are creating a seal so no air gets to your cabbage. Make sure there are no air pockets between the bag and side of jar on the inside. If this happens, it creates mold on your cabbage that is exposed but it could leak into the rest of your cabbage. You can tell by the picture what I mean. Phew! I did it. Now, I put my jars into a dark, cool place to let them ferment. Every day or two you will need to check to make sure cabbage is remaining under the water, no bubbles are forming, and no mold is present. Let your cabbage sit for up to three weeks checking frequently. The longer it sits, the better the ferment health properties get. After this point, you can decide what you want to do with your kraut. You can water bath it for longer shelf life or you can start tasting and eating on it. If you don't water bath it, you will need to refrigerate it.
I chose to water bath mine for longer shelf life because I knew I would not have room for three gallon jars in my refrigerator. On my canning day, I got my kraut out, got my work area ready, and started the canning process.
I removed the bag, stirred my kraut, and started filling my jars up to the neck leaving a one inch headspace. If I needed any extra water, I just added some up to the neck. I de-bubbled the contents, wiped the rims of the jars, and placed the lids and bands on fingertip tight. I wiped off the jars and started loading them into the canner. I filled my water bath canner with water making sure jars are covered completely about an inch over the lids. I waited for the water to come to a rolling boil, then processed (timed) for 20 minutes. After 20 minutes, I removed the jars carefully using a jar lifter and sat them onto a counter to cool down. It wasn't long until I started hearing those wonderful pops of the lids to let me know they were sealed.
You can watch the video versions here:
Non-Fermented Sauerkraut:
I also water bath can a non fermented sauerkraut. It's not exactly sour but it has vinegar so I guess that's why they call it sauerkraut. You also don't make a brine to fill the jars. It is an easy process so I will walk you through it.
Get your work station ready and everything set up. You will need to de-core and cut up your cabbage to thumbnail size. Pack cabbage in jars and keep pressing it down as you go but also leave a one inch headspace from the top. To each jar add one teaspoon of each: caraway seeds, apple cider vinegar, salt and sugar. Add boiling water to each jar leaving a one inch headspace from the top. Make sure to de-bubble contents of the jar. Wipe rims of the jars , place lids and bands on fingertip tight. Place jars in water bath canner. Add water to canner making sure to cover jars over the top of the lids. Bring to a rolling boil and process for 20 minutes. After processing time is complete, remove jars using a jar lifter and place on a counter to cool.
Did you know you can can coleslaw? No pun intended. It was a joke. But seriously, you can and it tastes so good.
This does have a brine and uses different seasonings. Get your work station ready and everything set up. De-core, and shred any color cabbage you want (I did some purple also, notice picture). You will need to shred some carrots too. I mean, this is coleslaw isn't it? Pack cabbage and carrots into the jars pressing down as you go but leave a one inch headspace from the top. To each jar, add 1/4 teaspoon celery seeds and 1/2 teaspoon mustard seeds.
Brine: (If you have a lot, you might want to double or triple recipe)
1 cup vinegar (you can use apple cider if you like)
4 cups water
2 cups sugar
1 tablespoon pickling salt
Heat brine long enough to dissolve salt and sugar. No need to boil.
Pour brine into jars up to the neck leaving a one inch headspace. De-bubble contents of the jar. Wipe rims off. Place lids and bands on fingertip tight. Place jars into water bath canner and pour water into canner making sure to cover jars over the lids with water. Bring to a rolling boil and process for only 10 minutes. After processing, remove from jars from canner using jar lifter and place on a counter to cool.
The only thing I have ever fermented is saurkraut. As I researched more and more, I knew I wanted to try more.
By all means, you can ferment vegetables the old way, but Dear Hubby made this process so much easier for me by gifting me a new fermenting kit by Masontops. It comes with pickle pebbles, a vegetable tamper, a pickle pipe, an instruction and recipe book. I have this in our Amazon storefront on my Canning and Preserving Essentials List. (link to my storefront is below).
There are so many benefits to fermenting. It produces the lactic acid that creates good bacteria for healthy gut flora. We all know what happens when our guts are out of whack. It causes so many health issues.
There are so many vegetables that you can ferment. I tried Ginger Carrots for the first time and, surprisingly, they were so delicious.
I followed the directions in the recipe book, and it was so easy. The only hard part is waiting for them to ferment. The spice from the ginger gave a little hint of heat that was just the right tone.
I used just regular long carrots to make these. I peeled and cut into French fry form and packed them into my jar. Not tight, just filled.
Added the ginger
Filled with water to the neck.
Carefully placed the weight in because I did not want to push any water out of the top of the jar.
Placed the pickle pipe on the jar, then screweed the band on fingertip tight. You do not want it too tight.
Set it in a cool, dark place to ferment for up to 4 weeks for the best results. The longer they ferment, the better.
Then I wanted to try the Kurry Kraut. The curry in this kraut was out of this world. We could use this on deli sandwiches as well as a side dish to any meal.
For this recipe, you can use all green cabbage and shredded carrots, but I wanted to add more color so I cut up purple and green. Didn't turn out too bad if I say so myself.
You pound your cabbage and carrots down a little at a time until they start releasing their juices.
Fill a little more and repeat the same process. Keep filling and pounding until the brine reaches the top and can cover the cabbage and carrots. You do not want any above the water, or it can spoil.
After all the juice is at the top, then place the weight on top, making sure no cabbage particles float to the top and no spillage of water. Place the picle pipe over the rim and add the band fingertip tight. Store in a cool, dark place for up to 4 weeks.
I have never had Kimchi before, but so wanted to give it a try.
I used the same colors for this as I did for the kraut. Isn't that pretty?
You add all your ingredients and use the same pounding process as the kraut.
Place the pickle pipe on and screw the band on fingertip tight. Again, store in a cool, dark place for up to 4 weeks.
At any time in the 4 weeks, you can do a taste test if you like. If it is to your liking, go ahead and use. If you think it needs more time, store it back in its place. After opening and using, store in your refrigerator. It keeps for quite a while.
Here is a video of the final results and taste test.
Tomatoes:
This is how I process my tomatoes to get them ready to make pasta sauce. I make one sauce but it has so many dual purposes in my house. We use it for spaghetti, marinara for bread sticks, and pizza sauce. I have even added a little broth or cream and made tomato soup.
First, I washed all tomatoes and let them dry. I got an assembly line going. You can go aheadand get you a pot and start heating up some water on stove.
While my water was heating up I got my trash can ready and coredthem. I do not peel them yet. I took them over to my stove.
I stared putting them into the hot water gently.
Only for a few seconds enough to loosen skin. Then I remove them from the hot water and immediately put them into cold water. This step is not necessary. You can skip to the next if you like.
I take them out and put on a cookie sheet to cool and then I peel off skins. Let me interrupt here just for a second. Some people do not take the skins off of their tomatoes. They will leave them on and blend them as well. I have done both ways. They turn out ok and it is thicker sauce but dear hubby didn't like it as well as well. It is a preference thing.
I then put them into Ziploc bags to freeze and save f0r when I am ready to make my sauce. If you know anything about tomatoes, you know sometimes they don't all come in at the same time and you may have to "save up" a bunch until you have enough to make a big batch.
If you want to go ahead and process whole tomatoes in jars after you peel them, you just put them into jars whole or crushed and process in a water bath. Make sure jars are fully submerged past lids in water. Process for 45 minutes I think. You can google that just to make sure. Then remove from water canner and let cool and you should start hearing……POPS then you'll know jars are sealed. Viola! Hope you enjoy them.
Now I will tell you how I make my pasta sauce and can it.
I will get all those wonderful tomatoes out of my freezer the night before and set them some where to thaw out overnight. Uh…I had 19 Ziploc bags so I put them in my tub. lol
The next morning I got all my jars, lids and bands ready. Then I set up an assembly line.
I put a strainer in the sink and I would take one bag at a time and strain any left over juice and water out. If you want to keep the juice just remember to use a thickener like tomato paste or cook down for a long time until most of the juice is evaporated. Yes, this can take a while. You can reserve the juiceand have tomato juice for soups and stews.
After straining, I put the tomatoes in a blender and blend until I get a puree.
Next, I pour that into a stainless steel pot and cook down. This can take a while depending on how thick or thin you want your sauce to be.
One year I had so much sauce, I used my roasting pan to cook down in. It worked great.
I add my spices. I just use salt, pepper, onion powder, garlic powder, Italian seasoning and sugar. Ooops, I forgot to put that in the picture. My bad. The sugar is to cut down on the acid taste in the tomatoes. People also use a little lemon juice to cut down on the acidity. To me this makes no sense because lemon juice is acidic and adds more acidity, but it is your preference. A lot of the canning police will "insist" that you have to, but again, it is your kitchen. Believe it or not all canning books suggest it. I tried it one year and decided right then I would not use it again. You can use any spices of your choice. Just note that if you add vegetables like onions or peppers or even meat you will then have to pressure can it or water bath it in a rolling boil for a longer time.
Um…I just eyeball everything. I don’t really measure. I have tried many different recipes and tweaked here and there until I found what I like. Do a taste test.
I will let that cook down to the desired consistency. Then I remove from stove or roaster andladle into warm jars. Be sure to wipe the rims at this point and de-bubble.
I put the lids and rings on fingertip tight.
I will put my jars into my water bather and then pour water in until it covers tops of jars.
When the water comes to a rolling boil then I will start timing. I let them process for around 30 to 45 minutes.
I then remove jars from water very carefully with a jar lifter and pot holder. Caution jars will be extremely hot. Just set somewhere for them to cool and after a while you should start hearing….POPS!!!! This is to let you know jars are sealinggood.
Viola! You have a wonderful pasta sauce to use for multiple things.
A few years later, dear hubby bought me the Kitchen Aid Food Mill attachment for my stand mixer. Just let me say, this process went smoother and faster. The only steps we had to do were wash, core and quarter the tomatoes to fit into the chute of the food mill. The food mill did the rest. It separated the skins, seeds and pulp while extracting the juice. We then just took the juice and poured it into our roaster and proceeded with the same process as mentioned in our other method of processing tomatoes. It did take longer to cook down because it was just the juice. But the taste was just as amazing. Now, if you use this attachment, you can throw all that wonderful pulp etc., out to the chickens or use as compost in your next garden. Another tip, don't waste those skins if you did take them off like in the first method. You can dehydrate those skins to make tomato powder. After they have dried really good, put them into a coffee grinder and grind to a powder. Use in soups and stews or other dishes to add extra flavor.
Here is the video version of using the food mill
Another favorite way we love to preserve tomatoes is to roast them, and I tell you this is a game changer. The flavor is phenomenal.
Start with fresh washed tomatoes, cut the core out and any cut off any spots or blemishes, cut into halves or quarters, lay on baking pan, and drizzle with olive oil. Now, at this point, if you want to add extra flavor, you can cut up onions and add garlic cloves to roast right along with your tomatoes. I choose not to because we do not know what all we will use our tomatoes for in different recipes, so I left them out. Roast in the oven at 375 or 400 degrees until the skins are wrinkled, or if your are like us, until you get some blackened skins on them. Take them out and let them cool off.
While they are cooling, prepare jars and either use a little lemon juice or salt for your preservative or citric acid. I chose to add a 1/4 teaspoon salt to the bottom of each jar as my preservative. Ladle tomatoes into jars and make sure to press down to remove any air space and fill jars to one inch headspace. Wipe rim of jars off to clear any juices or oils that might have spilled, because this will cause your lids not to seal properly. De-bubble. Apply lids finger tip tight. Place in water bath canner making sure water covers jars completely. Bring water to a rolling boil, then start timing and process for 40 minutes. After processing time has finished, remove from canner to cool and you should start hearing all those wonderful pops.
Here is the video version:
Salsa: Normally, I use Ms. Wages Salsa Seasonings Mix packages to make salsa and it is the bomb. I prepare the tomatoes the same way as for my pasta sauce, then I follow the directions for processing on the back of the package.
Salsa:
One year I tried another recipe for salsa. I used my tomatoes, bell peppers (all colors), onions, cilantro, fresh minced garlic, cumin, sugar (to cut down on acidity) and lime juice. I put all my ingredients into my food processor and pulsed until I got it to the consistency I wanted. You can prepare your tomatoes any way you want for this one. I have already given you two good examples.
No, once again I didn’t measure anything, sorry. I used my big roasting pan again and eye balled everything. I cooked it down most of the day and overnight on very low. Like simmer. Then ladled into jars and water bathed for 45 minutes. Viola! Heavenly. I don't have a video yet of me making salsa.
Homemade Enchilada Sauce:
I use Pioneer Woman's recipe for her sauce. We love it. You can google her recipe from Food network. I quadruple this recipe and make it by the batches.
I use our peppers from our garden in this recipe. I follow her directions and remaining ingredients. Next, I cook the sauce down and ladle it into jars and process in the water bather for 30 to 45 minutes. Her recipe is a hit in our home.
CHICKEN OR TURKEY STOCK:
Making Stock is easy. This year I made Turkey Stock from the carcasses of two turkeys. All you need is the carcass of a turkey, any desired vegetables you want like onions, celery, carrots, garlic, peppers. Is actually added some butternut squash to mine. Then spices like salt, pepper, rosemary, thyme, parsley, etc. I would not add too much salt due to some recipes call for extra salt as well. Then your water. That’s it. Here are the directions:
Step 1- chop/dice desired vegetables. Put in stock pot with spices and turkey carcass. Cover with water until carcass is fully covered. You can simmer this on the stove for most of the day or you can transfer to crock pots or roasting oven and simmer overnight. It needs to simmer for at least 18 hrs.
Step 2-3- after stock has simmered and cooled down, strain carcass and vegetables, reserve liquid stock.
Step 4- ladle stock into jars and wipe rims off. Then place lids and rings on fingertip tight.
Step 5-prepare canner by pouring the amount of water in the bottom of the canner as directed in your owners manual. Make sure the water in the canner matches the temp of the stock in the jars. You do not want hot jars and cold water.
Step 6- Place the lid on the canner, let vent for 10 minutes, place weight (or bobbler) on. After it comes to pressure and the weight either jiggles or rattles, then start timing. Process for 35 minutes at your pounds of pressure for your altitude for quart jars.
Step 7- after processing time is complete, pull canner off to cool and depressurize. Remove lid carefully and remove jars with a jar lifter onto towel to cool and seal. When you hear each jar pop they have sealed.
Vegetable Stock:
I make vegetable stock the exact same way as I do my turkey and chicken stock. I follow the exact same procedures and directions. I save all kind of vegetable scraps to make stock. You can start saving things like onion tops and bottoms, carrot tops and bottoms, celery, lettuce, zucchini, squash, etc. If you don't have enough to do a big batch at once, just start saving them up into a Ziploc bag and put in your freezer until you have enough to make a big batch.
Step 1- chop/dice desired vegetables. Put in stock pot with spices. Cover with water until vegetables are fully covered. You can simmer this on the stove for most of the day or you can transfer to crock pots or roasting oven and simmer overnight. It needs to simmer for at least 18 hrs.
Step 2-3- after stock has simmered and cooled down, strain vegetables, reserve liquid stock.
Step 4- ladle stock into jars and wipe rims off. Then place lids and rings on fingertip tight.
Step 5-prepare canner by pouring the amount of water in the bottom of the canner as directed in your owners manual. Make sure the water in the canner matches the temp of the stock in the jars. You do not want hot jars and cold water.
Step 6- Place the lid on the canner, and lock lid. Let vent for 10 minutes, then place weight (or bobbler) on. After it comes to pressure and the weight either jiggles or rattles, then start timing. Process for 35 minutes at your pounds of pressure for your altitude for quart jars.
Step 7- after processing time is complete, pull canner off to cool and depressurize. Remove lid carefully and remove jars with a jar lifter onto towel to cool and seal. When you hear each jar pop they have sealed.
Vegetable Stock: video version:
APPLE JELLY:
I washed, rinsed, cored, seeded and sliced my apples. I put slices into a stock pot and filled with just enough water to cover apples. Then I cooked down the apples to get the juice. It will turn to kind of a mush like consistency. Strain the apples in a colander or if you prefer, a cheese cloth, and retain juice.
Pour juice back into a stockpot, gather all your ingredients, which will be your sugar and Sure-Jell or Jell-Ease etc. Wash your jars and lids and let dry. Don’t freak out when I say I reuse jelly jars or any kind of jars with the pop top lid. They are perfect for making jelly. However, you can only use them a few times due to the seal eventually wearing out. Now, I follow the directions inside the box of Sure-Jell. I remove the cooked juice, and ladle into jars, wipe jars off around rim and sides, tighten on lid and put on a towel upside down to cool and set. Now, don’t freak out again because you can set them this way. You also can follow the directions to process them in the water bath if you prefer. If you do them the way I did, by turning them upside down, work quickly cause the liquid needs to remain very hot in order to make the seal pop in the lid when it is cooling. After a while you should start hearing the jars pop. This is a good sign, it means your jars have sealed. Check them after several hours to see if they are setting, which means they are getting thicker like Jello. Viola! You have made Jelly. This is just one way I do mine.
You can also use the scraps to make apple cider vinegar. You will need to do your research on that one because I have not tried that yet. You can use all the scraps to put into a pot, add water, boil down and extract more juice and use to make what is called scrap jelly. The peels can be eaten as a snack with some kind of spread or peanut butter. You can bake them and eat as a snack. You can dehydrate them and use in trail mixes and granola bars. Use the peels and add water to a pot, simmer them down and puree to make apple sauce to eat or use in baking. You an use the peels and make an all natural all purpose cleaner. Take your peels and put them into a Mason Jar, add distilled white vinegar all the way up to the neck of the jar. Put in a cool dry place and let steep for 7 to 10 days. After steeping, take about a few tablespoons of the vinegar and put in a big spray bottle, finish adding with water to dilute the vinegar a little and add a few drops of essential oils. Use as an all purpose cleaner around the home. Dehydrate the peels and grind up into powder, use in cooking or baking as a seasoning. Last but not least, feed the wildlife.
Low to no sugar Apple Jelly:
This is a quicker way of extracting the juice to make jelly. And this time we will be making a low to no sugar version. We had to switch sugars due to health reasons.
We are using a steam juicer today to make this process so much easier. We bought my mother one for Christmas one year and she loves it. It takes so many steps out for her. If you want to collect your juice another way, you can skip this part because I am going to show you how to set it up. But wait, if you have never used one of these, I would highly recommend it. If you are interested in getting one, I have this one in my Amazon Store on my Canning and Preserving Essentials list. The link to my Amazon store will be linked below.
Place the water pot onto your stove and fill it with water up to the fill line.
Then place the middle pot, which has a funnel-shaped colander in it, on top of the water pot. It is also the pot that has the hose connection sticking out of the bottom of the pot. Make sure the post of the hose connection sits right down into the half-moon cut-out space.
Just like this, and attach the hose.
At this point, clamp the hose shut using the clamp that is attached to the hose, and then hook it to the handle of the pot. This way, no juice will start leaking out while the steamer is extracting the juice.
Second, be sure to prepare your jars and heat them up to keep warm, as you will be placing hot liquid into these jars. I like to warm mine up in my oven on a low temperature.
Next, we are getting all of our apples washed, sliced, and cored. We do not peel our apples because all the vitamins are in the peels, and we don't want to waste those nutrients. If you do not want the peels, by all means, you can peel yours. We use a nifty kitchen gadget to make this process so much faster.
This little gadget slices and cores at the same time.
We check for seeds, and then we toss them into the strainer basket of the steam juicer.
Once it is all full, we place the strainer basket on top of the middle pot of the steam juicer.
Place the lid on the strainer basket and turn your burner on to start heating up.
As the water heats up, it steams the juice out of the apples and sweats them down. The juice is being collected in the middle pot. This will be around a 30 to 45-minute process
In the meantime, save those cores, and if you have peeled your apples, save those too. We are going to put them to use. Put those into a big pot and add enough water to cover the contents. Bring them to a boil and let them boil just long enough to draw out some more juice. Or you can just set the to simmer for a while. Which ever fits your timetable better.
After they have simmered or boiled down a little, strain the liquid out into a bowl and reserve it for later. This will be extra juice to add with the other that will be used in making the jelly.
After about 30 minutes, take the lid off the steam juicer and use a potato masher to mash down all the apples. This extracts more juice and also lets you see how much more they need to sweat down.
Replace the lid and let this for for a bit more. Keep an eye on it. Now, we need to get this set up to catch the juice by using gravity. This is our setup. This steamer works well using gravity to pull the juice down to the hose. We like to take a dishpan (since we are already going to be using it to boil the juice) and place it in a chair or you can use a table, etc. If you are just collecting the juice for drinking, like grape juice, you can collect the juice in a pitcher or individual jars for canning. Make sure at this point the hose is still clamped tight.
Once you start seeing juice collect in the hose, you can release the clamp and hook it onto the hose post and let it freely drain into the pan.
Look at all this liquid gold.
Repeat the process of mashing and draining, mashing and draining, until you think all the juice is extracted from the apples. Remove the top pot, which is the strainer basket, and set it aside. You can turn off your burner or stove eye now. Tilt the middle pot that has the hose attached, and drain out the rest of the juice to empty the pot.
We like to clear off the stove at this point to make room on my big burner to place the dishpan of juice onto to get ready to make the jelly. We are multitasking since there are two of us, but I will try to keep the instructions separate.
Jelly:
Place the dishpan or pot of juice back onto your stove. Turn your burner on. Since we are making low to no-sugar jelly, we use Pomona's Pectin, and there are a few little steps.
The box comes with the pectin that is designed to work with sugar substitutes. And there is a little package of calcium to turn into water that acts as an activator to gel the juice. Short version, basically you measure out your pectin according the amount of juice you are using in a recipe and mix that in really good with your sugar. You take the amount of calcium and mix it in with the amount of water that it calls for in your recipe. The calcium water goes in with the cold juice or fruit if you are making jam. You bring it to a boil. Then you add your pectin, sugar mixture to the juice and bring to a boil again and let it boil for two minutes. You need to stir constantly and quickly to make sure it does not stick to the pan. You will observe in the following pictures.
We are strictly using the directions that come inside the box as well, so this is not my recipe. If you are not using this particular pectin, follow the directions that come with the pectin you are using. We also use this book sometimes for other great recipes and apple jelly. It is packed with so many recipes for all kinds of different fruits to make jellies, jams, preserves, honeys, and butters.
Both the pectin and the book are in my Amazon Store on my Canning and Preserving Essentials List. Link to my store is below.
We first have to make the calcium water, and you will have a bunch left over because this little packet and box of pectin is able to make 3 or 4 batches of jelly. So when you use what you need for one recipe, you store the rest of the water in the refrigerator for the next batch.
You are to add the calcium water, along with some lemon juice, to the juice. Then bring to a boil to activate the gel action.
While that is coming to a boil, mix your sugar and pectin together as per instructions in the package directions or book.
When the juice has come to a boil, add the pectin and sugar mixture, mixing very thoroughly to avoid any clumping and to make sure all ingredients are combined well. We do this with a whisk because we use Stevia, and it is a fine powder. Bring this to a boil again and boil for two minutes, making sure to keep stirring to keep from sticking.
After two minutes, remove from heat, ladle into warm jars, wipe rims of the jars, place lid and band on, and tighten finger-tight.
Place jars into a water bath canner, cover jars with water in the canner until jars are completely covered and under water (about an inch or two above the lids), and process in a rolling boil for 10 minutes.
After 10 minutes, remove from the canner with jar lifters and set aside to cool and seal.
You should start hearing those wonderful "pings". Leave these sitting overnight to cool. The next morning, check the seals and if they are all sealed, place them in your pantry. If you have a jar that didn't seal, put it in the refrigerator and let it be the first jar you use up. If, for some reason, the jelly did not "set", all is not lost. You can still use this "syrup" to pour onto pancakes, waffles, yogurt, or ice cream. You can use it as a liquid base in baked goods like pancake and waffle batter, muffins, breads, etc. Don't let it go to waste.
Applesauce:
Take your steamer pot from the steam juicer and pour all the contents into a crock pot. All the juice should be out of it by now.
If you have an immersion blender, blend and puree all the apple slices, ensuring the peels are pureed thoroughly.
At this point, I am going to use half to make the apple sauce first and reserve the other half to make the apple butter. If you want to season your apple sauce, you most certainly can. I choose not to because I can season it when it is eaten or if I am using it in a recipe.
For the apple sauce, I will ladle the puree into my jars up to the rim, leaving a one-inch head space. Then, I use my debubbler tool to make sure there are no air bubbles in the jar. You can also give the jar a little shake or tap the jar on the counter to make the bubbles come to the top. If you have any air bubbles in any kind of puree, this could capture bacteria that can cause mold spores. So removing the air bubbles is very important. After removing the air bubbles, I wipe the rim, place the lids and bands on finger tip tight. Place jars into a water bath canner and fill with water until the jars are completely covered with water. Place the lid on the canner and process for 10 minutes after the water comes to a rolling boil. Remove from the canner and set on a counter to cool.
Applebutter:
The remaining puree in the crock pot will now get turned into delicious apple butter. To the puree, I will add brown sugar and cinnamon and stir it in until well combined. You can add any other spices that you would like for yours. Put the lid on your crock pot, and let it slow cook overnight on low to create the caramelization. The next morning, ladle into your jars up to the neck, leaving a one-inch headspace. Debubble the puree to remove all air bubbles. Wipe the rim of the jar, place lids and bands on finger tip tight. Process in a water bath canner for 10 minutes after the water comes to a rolling boil. Remove from the water bath canner with a jar lifter and set onto a counter to cool.
You have now made three things with all those apples, and nothing went to waste.
If you would like to see video versions of making apple jelly, apple sauce, and apple butter, click on the videos below:
If you would like to know more about a Steam Juicer and how to set one up and use it, you can watch this video:
Jams:
Making jams is almost the same as making jellies, except you are working with the pulp of the fruits, not just the juice. You are not extracting the juice. You basically wash, peel, core, deseed, destem, etc., the fruit you are using. After you have prepared the fruit, place it in a pot or bowl and crush or mash it gently. If you want it less chunky, you can gently pulse with an immersion blender. Measure fruit according to the recipe you are using, and pour it into a pot. Bring to a simmer and add your sugar, gelatin, lemon juice, etc., whatever the directions say. Then, proceed with the steps listed above for filling the jars and processing.
Here are a few more videos of us making jams:
Jalapenos:
I prepare my jars by washing and rinsing jars and lids and let them dry. I wash and rinse my peppers and remove just the stem by breaking it off. They will have trouble fitting into the jar if you don't.
I place my peppers into the jars making sure to shake as I go so they will pack a little further but not overcrowd. I fill the jar with water up to the neck, leaving a one inch headspace. De-bubble contents of the jar. I wipe the rims of the jars off. Then I place lids and rings on fingertip tight.
Place jars into the water bath canner and fill with water, enough to cover jars, even over the lids. Put lid on canner and bring to rolling boil. Process for 30 minutes. Remove from canner with jar lifter and set on a counter or somewhere to cool and seal. After a while of cooling you will start hearing pops which lets you know the jars are sealing. Store in your pantry. They should keep for a long time if sealed properly. Homemade canned jalapenos.
GREEN BEANS:
Freezing green beans:
You can freeze green beans too. You wash, rinse, and string your green beans. Transfer them to a stock pot and cover with water. You just want to blanch them at this point for about 3-4 minutes. You don’t want to bring them to a boil. You still want them a little crisp. Remove from the hot water and immediately put into ice bath to stop the cooking process. Remove from the ice water and lay on a towel to dry or you can pat them dry. Place into Ziploc bags and seal or you can use a vacuum sealer like we do. They should keep in the freezer for a long time.
Canning Green Beans:
We pick, snap, string and wash our green beans. Then I fill the jars with the beans shaking as I go so they will pack better in the jars but not overcrowd. I fill with water to the neck leaving a one inch headspace. De-bubble, wipe rims of jars off and tighten lids and rings on fingertip tight. Place the jars into the pressure canner and put the lid on and make sure it is locked. I let the canner vent for 10 minutes then place the bobbler or weight on. When the weight starts to jiggle or rattle, I start timing. I process them for 25 minutes at 10 lbs. pressure for my altitude.
Here is the video version:
CORN:
This is how we process our corn. First, dear hubby (and anyone else who joins in) will pick and shuck all the corn outside. We found two different ways to do this. One way is, while in the garden, dear hubby will go down the rows and cut the cobs off and shuck them one at a time and fill up buckets. Then he will bring the buckets inside to me. Or, he will hook up the ATV to a cart, go down the rows, cut the cobs off the stalks, and toss into the cart. Then he will drive up to the back yard, under the shade trees and they will shuck all of it, toss into buckets and bring them in to me. He then has to dump all the husks and silks that are in the cart, back into the garden for compost.
We found that shucking and leaving all the husks and silks right in the garden was our better option because it was so much faster and cut out a few steps.
While they are working outside, I start getting things ready in the kitchen.
He brings the buckets in and dumps the corn into the sink for me. We wash and scrub any remaining silks off. Kids love to do this because what kid doesn't love playing in the water? It keeps them entertained and as a bonus, they are learning.
Next, we lay them on our island on a towel to dry. When they are dry, I portion them into meals and put them in vacuum seal bags and use our Food Saver to seal them. They go into the freezer.
We love freezing them on the cob for many reasons. It saves us a ton of time and they retain their moisture better. When I get ready to use them, we take a bag out and thaw them out. If I want cream corn, I will cut and scrape it off when I get ready to cook it. If I want whole kernel corn, I will do the same right before the meal. If I want corn on the cob, it is simple, vacuum seal bags are steam-able in the microwave too. I cut open the bag, put on a plate, and steam in the bag in the microwave for about 3 minutes then flip and 3 minutes more. It comes out delicious.
Now if you have animals, they could probably benefit from the shucks. You can use the silks to make a corn tea for health benefits and use the cobs to make corn cob jelly. I have never made corn cob jelly but maybe one year I will try. There are so many uses just from corn. You can dry the corn on the cob and shell, grind and make corn meal. See, I told you.
First Corn Processing Video Version:
Updated video:
PINTO BEANS:
I don’t grow pinto beans so I buy them in bulk. I can pick anytime I want to, to can beans this way. I have canned them in the winter. There are two ways I can them. One is the soaking method and the other is the no soak method.
Soaking Method:
The day before, I will soak the beans over night. Some people will fully cook them first and then pour into jars and can, but I don’t.
I will take the soaked beans, drain and rinse the old water off, then fill jars with the beans only about 3/4 full. They will swell a little more when cooked in pressure canner. Then I fill the jars with fresh water up to the neck leaving a one inch headspace. Use something to de-bubble the jars to get rid of any air pockets. I wipe the jars off around the rim, tighten on lids and rings fingertip tight, and place in pressure canner. Place the lid on and make sure it is locked. Let vent for 10 minutes. Place weight or bobbler on. When weight or bobbler starts to jiggle or rattle, then start timing.
I follow the Ball Blue book for processing which is 90 minutes for quarts at 10 lbs. pressure for my altitude. After processing, let canner cool and depressurize. Remove the lid carefully, remove jars using a jar lifter and place jars somewhere to cool. After a bit, you should start hearing pops.
You can do any dried bean this way. Follow directions though. When I open a jar, I always just add a little more water and cook on the stove a little.
Now, I have searched and searched for a better and easier way to can them, and let me say, I love this method better. Disclaimer: This is not USDA recommended. I am just a rebel and wanted to experiment. I always think, where there is a will , there is a way.
No Soak Method:
These are the steps I took when I first started canning them using the no soak method.
Step 1 and Step 2: Wash beans and pick out any debris, rocks, or bad beans.
Step 3: I get a little vinegar and paper towel ready for wiping jar rims. You can use water if you prefer.
Step 4: Wash, dry and sanitize jars and keep warm in a warm oven.
Step 5: I warm up some water in a big aluminum pot on the stove, and in another pot I will boil my lids and rings.
Step 6: I prepare my canner with water in the bottom and put the rack in the bottom of the canner. Check your manufactures directions for how much water to put in your canner.
Step 7: I get a work station set up with my boiled water, pot with hot lids and rings, jars, bowl of vinegar and a paper towel, wooden spoon and my funnel.
Step 8: I put one cup (you might can add a 1/4 cup more) of dried beans into each jar.
Step 9: I pour the hot water from the aluminum pot into each jar about 1" head space from the top.
Step 10: I take a wooden spoon and stir really good to loosen any debris or bad beans, and get out air bubbles.
Step 11 and 12: Bad beans and debris floats so you will want to remove them.
Step 13: I will wipe each rim of jar off with the vinegar I have in my little bowl with the napkin. Then I will place hot lids and rings onto jars and just screw them on finger tight.
Step 14: Place jars in canner and put lid securely on the canner. Let vent for 10 minutes then place weight or bobbler on. Start timing when you hear or see the weight start to jiggle.
Step 15: I process at 10 lbs. pressure for 90 minutes. Be sure to check your manual too for lbs. pressure for your altitude. In this photo, my pressure got a little high, so I had to back down my heat some. You have to find your stoves sweet spot some times when canning. 😄😄😄
Step 16: After they have processed, I move the canner off stove to cool and let pressure come down so I can safely take off lid and take out jars with a jar lifter to cool. And you know they are sealed when you hear those "pings". You need to check the lids to make sure they have all sealed too. You can thump the top and if one is not sealed, you will be able to hear the difference. It will sound more hollow.
If you prefer, to make it even easier, you do not have to boil your water or lids and rings on the stove. You can use room temp water, dry lids and rings and room temp jars. I posted those directions first because that was my first time trying them that way. Once I got the hang of it and liked this method so well, I made it even easier on myself and cut out a few steps. By all means if you feel more comfortable doing it the other way, please do. Your kitchen, your rules.
To me they look so much better than the way I was doing them.
They do look different than the other way of processing. I personally love it better. When it is time to have a jar for a meal, I just open the jar and empty into a pot on the stove and cook for a few more minutes. Sometimes I cook them in the microwave. Viola'
One year I got frisky and canned some with ham pieces that were left over from a smoked ham. I used the same no soak method directions, using all room temp equipment. All I did extra was add cubed up ham pieces. I had to make sure I de-bubbled really good to get rid of all those air bubbles. Then I processed them the exact same way. They turned out so delicious especially with a side of cornbread.
Here is the video version:
Purple Hull Peas:
Yes we can grow them and we also barter with a family member and trade vegetable for vegetable. All we do is shell, wash, place the peas in jars up to the neck, add water leaving one inch headspace, de-bubble, wipe rims of jars so nothing interferes with the sealing, place lids and rings on. They need to be pressure canned at 10 lbs. pressure for 90 minutes for my altitude. I remove the canner from the stove to the counter on a towel or something to cool and depressurize. Remove the lid carefully. I remove the jars using my jar lifter and set them out to cool. You should start hearing pings as they cool down. Check your lids to make sure they sealed before storing in your pantry.
These are so easy even my grandchildren helped me.
You can see that here:
You can see the video version here:
POTATOES:
I wash and scrub my potatoes then lie them on my counter on a sheet or towel so they can dry just a little. Then I get my jars, lids and bands ready. You can choose to peel or not to peel. I sometimes do both. I cut up the potatoes into cubes, fill the jar up to the neck, and then add water to the jar leaving a one inch headspace. You can add a little salt but it’s optional. De-bubble. Then I wipe the rims of the jar off and place lids and rings on fingertip tight. Place them into the pressure canner with the amount of water in the canner that my manual calls for. I place the lid on making sure it is locked. Let it vent for ten minutes, then I place my weight on. When it starts jiggling, I start timing. It’s 40 minutes at 10 lbs. pressure for quarts for my altitude. When they are finished, processing , I remove canner to cool and depressurize. Then I remove lid carefully and take out jars with jar lifter and pot holders. Extremely Hot. Then I put them on a towel to cool and wait for the “pops”.
There is another way you can pressure can potatoes. It is called Dry Packing.
The only difference between the two processes is this one you just omit the water. That's right, just cut potatoes the way you want to preserve them like wedges, cubes or French fries and pack into the jars raw, wipe the rims of the jars and put on lids and rings. Process for 40 minutes at 10 lbs. pressure for quarts.
Key Note: If you want to eliminate a lot of starch, you can cut them up, put them into a pot, cover them with water and let them soak overnight. Then strain and rinse off potatoes until water runs clear. I like to lay out mine onto a towel or sheet and pat dry. This keeps them from turning brown when exposed to air. Then proceed to using either method of processing.
I also can baby potatoes using the dry pack method and I leave the peels on. Talk about delicious.
Freezing potatoes:
Freezing potatoes is another way I like to preserve them. I buy potatoes when they're on sale. Yes, we can grow them too but some times I can save that space in the garden and use it to grow something else and utilize my space in the garden.
On processing day, I wash and dry, cut into desired pieces whether it be French fries, cubes, rounds, hash browns, etc. Rinse potatoes again to get rid of any debris. You also rinse again to remove any starch. You can also presoak your cut up potatoes overnight, or you can soak them for just 20 minutes to remove starch before the processing. After soaking, just strain and rinse until water runs clear.
You will want to blanch or partially cook the potatoes for the next step. This helps the potatoes cook up crisp and not turn brown when thawing out before you cook them. You can do this two different ways. You can place in boiling water and boil for three minutes, which is called blanching, then dip into cold water to let cool and stop the cooking process. Or you can dump into a colander and rinse with very cold water after boiling to stop the cooking. Choose you a method that works for you. To me blanching takes longer.
I found an easier way that works for me and it goes way faster. The way I partially cook mine is, I will place them into a Ziploc bag and place in microwave with bag open and I will steam them for 4 minutes then flip bag over and steam for another 4 minutes. Immediately remove from oven, being careful not to burn myself, and pour into a colander and rinse under cold running water to stop the cooking process. Drain, spread onto a lined cookie sheet with parchment paper, pat dry some more to remove excess water as not to form ice crystals. Then I place in freezer and flash freeze for 30 minutes. Remove from freezer and divide into meal portions, and store in our vacuum seal bags and seal them and store in freezer. If you do not have a vacuum sealer, you can put in Ziploc bags and make sure all air is removed then store in freezer. When you are ready to cook them just remove from freezer and let thaw at room temp or thaw in the refrigerator what ever your prefer. Cook as desired.
If I am crunched for time, sometimes I skip the flash freezing part and after steaming in the microwave, I will remove the bag and lay it on the counter to cool under the ceiling fan. After cooling, I will vacuum seal the bag and then place in freezer. Hey, sometimes a girl has got to do what a girl has got to do. Doing them this way works too and they cook up just fine.
Sweet Potatoes:
We do grow these and we purchase them when they are on sale. We love sweet potatoes in so many dishes. They are a great substitute for diabetics over the regular potatoes. We freeze and pressure can these. I do not have to presoak sweet potatoes, because they are not as starchy. I do not blanche or partially cook them either.
When I pressure can them, we peel, cut up into cubes, place into jars, you can either add water or do the dry packing method which we love better. If you add water, do so to the neck leaving one inch headspace. Wipe rims of jars, de-bubble, place lids and rings on fingertip tight. If you are dry packing, there is no need to de-bubble. Just pack jars tight and then wipe rims of jars off and place lids and rings on fingertip tight. Place into pressure canner, lock lid on canner, vent for 10 minutes, and place weight on. Start timing when weight jiggles.
Process in the pressure canner for 90 minutes for quarts at 10 lbs. pressure for my altitude. After processing, remove canner from stove to cool and depressurize. Remove lid carefully, remove jars with a jar lifter and set some where to cool. You should start hearing pings letting you know jars are sealing.
Freezing Sweet Potatoes:
I peel my potatoes and then wash to remove any debris that might be on them. I can cut them into wedges, French fries, or cubes. I do not blanch or partially cook my sweet potatoes before freezing. I just place them into vacuum seal bags, vacuum seal and place into freezer. Easiest process ever.
I also will bake whole sweet potatoes and after baking, remove from the oven, let cool and peel the skins off. Then I puree in a blender or food processor. Sometimes I will even use a potato masher and puree in a big bowl. Then portion into 1 cup servings into a vacuum seal bag, and vacuum seal. I then mash the bag flat for better storage when placing in the freezer. I use these in baking things or sweet potato pie and sweet potato casseroles. Sometimes I will add pureed sweet potatoes to pancakes, waffles, muffins, breads, etc.
Here is the video version:
BELL PEPPERS:
We freeze our Bell peppers with our vacuum sealer. I bring them in and wash them, deseed and cut them up in strips. Put them into the bags and seal them. Perfect for easy meals.
The second way we preserve our peppers is to roast them and then water bath them for longer shelf life. Start with fresh washed peppers. Remove stems and seeds. Cut into strips or leave them whole. Place on a baking sheet, drizzle with olive oil, and roast at 375 or 400 degrees until skins are wrinkled. Or we like ours blackened. Remove from oven and let cool. While they are cooling, prepare your jars. Pack jars with peppers and keep pushing down until you get to one inch headspace. Fill the jar with water up to the neck, de-bubble, wipe rims of jars to remove any juices or oil that might interfere with the seals on the lids. Place lids on fingertip tight, place in water bath canner. Fill the water bath canner with water making sure water covers jars completely. Let the water come to a rolling boil then start your processing time. I processed mine for 75 minutes. If you want to go longer, you can. After they process, remove from the canner with a jar lifter to cool.
Here is the video version:
BROCCOLI:
We also freeze our broccoli. I will bring it in and wash the heads. Then I cut up into flowerets. I even cut up some of the stalks for extra crunch especially in broccoli and cheese soup. It is a good idea to blanch the broccoli first. Boil in water for three minutes, then remove from boiling water and dip in cold water or you can pour into a colander and rinse under cold water. Another quick way is to place in a Ziploc bag with just a 1/4 cup water and steam for 2 minutes in the microwave. Then place on a lined cookie sheet with parchment paper to dry and flash freeze for 30 minutes. Remove from freezer and place in a Ziploc bag and remove all air and place in freezer for storage. I use our vacuum sealer to store ours in the freezer.
If I don't blanche or steam before I freeze them, when it is time to cook with them, I take them out, let them defrost, cut a little slit in the vacuum seal bags, (Food Saver vacuum seal bags are microwave steam-able) and put in microwave and steam for 3 minutes. Then I proceed to use them in the intended recipe. This method also takes the bitter taste out of frozen foods.
When it is time to cook, you can thaw it out and you can even steam the broccoli in the bag and serve, or cook it how you like. You can use this same method for cauliflower, carrots, celery etc.
Baked Beans:
You can use any recipe you want to make your baked beans. I start with soaking dried navy beans over night in my roaster. You can substitute pinto beans too. I have done this and it works well. That way you only have to buy one bean and get multiple uses out of them. Next morning I drain the beans and place back in cooker then I will add my ingredients from my recipe. I let them cook on low or you can cook on high. Then I ladle beans and sauce into warm jars using a jar funnel. I make sure to de-bubble, wipe the rims of the jars, place lids and bands on fingertip tight and place carefully into the pressure canner. I place the lid on making sure it is locked, let it vent for 10 minutes, then place the weight or bobbler on. Process at 10 lbs. pressure for 90 minutes for quarts at my altitude. After processing time, remove canner from stove, set aside to let cool and depressurize. Remove lid carefully and remove jars using jar lifter. Set jars aside to cool and you should start hearing pings to let you know they are sealing. Store in your pantry.
Chilli:
Choose any recipe you want for your chilli. After cooking, ladle into warm jars using a jar funnel. De-bubble, wipe rims off, place lids and rings on fingertip tight and place into pressure canner. Make sure canner lid is on tight and locked, let vent for 10 minutes. After venting, place weight or bobbler on. Start timing when the weight jiggles. Process for 90 minutes for quarts at 10 lbs. pressure for my altitude. After processing, remove canner from stove, set aside to cool and depressurize. After depressurizing, remove lid carefully and remove jars using a jar lifter to set aside and cool. You should start hearing pings.
You can also can vegetable soup this way too. Comes in handy and warm on a winters day.
Meats:
We buy meats when they're on sale and in bulk. We bring them home, repackage into meal portions, vacuum seal, and put in freezer. This saves so much money. Dear hubby loves to use fat trimmings from different meats like loins, briskets and roasts and turn them into delicious things. He will use them in making breakfast sausage or deer summer sausage.
Here are a few of dear hubby's videos.
Rolls and Buns:
Sometimes I make up rolls or hamburger buns using a trusted recipe and then I place them on cookie sheets and flash freeze to keep the dough from sticking together. Place into Ziploc bags and put in freezer. These I don't vacuum seal because the vacuum will crush them. When put in Ziploc bags, I can open bag and take out what I need and close the bag. I also love to buy canned biscuits on sale. Bring them home and lay them out onto cookie sheets. Flash freeze for 30 minutes then place them into Ziploc bags as well. Take out biscuits as needed for a meal and bake. You can do the same with biscuits also.
Pickles:
We pick, wash and slice or spear our cucumbers or we leave them whole. We raw pack in jars. We love Ms. Wage's Kosher Dill Quick Processing seasoning packages and follow the directions on the back of the packet. We ladle the hot brine into jars up to the neck leaving a one inch headspace. De-bubble, wipe rims, and place lids and bands on fingertip tight.
You can process pickles two different ways. You can water bath just long enough to seal jars or after filling jars to the neck with hot brine and tightening on lids, you can turn upside down and let cool. Jars will still seal this way and they turn out crispier. (Please make sure jars are sealed before storing them if you choose this way). If I process mine in the water bath canner, I place jars into canner, add water to make sure they are fully submerged, bring to a rolling boil and process for about 10 minutes. Remove from canner using jar lifters and set aside to cool.
Carrot’s, Onions, and Celery:
I can't grow carrots for the life of me so we buy them when they are on sale and bring them home to process them. If I am freezing them, I wash, peel, and cut them up how I want to and then put them into vacuum seal bags and freeze them. We also do celery and onions this way too.
Here is a couple of videos where I have canned celery to try and also what I do with all those wonderful scraps:
We also can our carrots. To do this, wash and peel your carrots, cut them into rounds or chunks or however your desire. I also buy baby carrots too when they are on sale. Place raw carrots into jars up to the neck, shake jar occasionally to pack better into jars. Pour water over carrots up to the neck of the jar leaving a one inch headspace, add one tsp salt. De-bubble, wipe jar rims off and place lids and rings on fingertip tight. Process in pressure canner for 30 minutes for quarts at 10 lbs. pressure. When pressure canner has cooled, and depressurized, remove lid then remove jars with a jar lifter and set aside to cool. Listen for the pings. Check jars to make sure all have sealed before storing in pantry.
Video version here:
Onions:
We buy onions in bulk when they go on sale. We will bring them home and preserve them. One way is freezing them. We peel and cut up into cubes or strips. We have even froze some whole before and they were fine. We do not flash freeze. We just put cut up onions into vacuum seal bags (Ziploc is fine) and vacuum seal them and into the freezer they go. Great for quick meals.
Another way we preserve onions is to can them. I love to do big batches if I am going to do onions, that way I only cry real bad once. lol. To a big roasting pan, I add peeled and sliced onions. Then I add a few sticks of butter and let those simmer and caramelize overnight. The next morning, I will make a solution of broth (beef or vegetable is fine) and a few packets of Lipton Onion Soup Mix in a gallon stock pot. I bring this to a boil for a few minutes to incorporate all the seasonings. I get my work station ready to start filling jars. I start with warm jars and ladle two good scoops of caramelized onions into the jars. Next, I ladle the broth mixture into the jars up to the neck leaving a once inch headspace. De-bubble, wipe rims of jars, place lids and bands on fingertip tight. Place jars into pressure canner, lock lid into place, vent for 10 minutes, then place weight or bobbler on. Start timing when weight bobbles and process for 40 minutes at 10 lbs. pressure for my altitude. After processing, remove canner from stove and set aside to cool and depressurize. Remove lid carefully, remove jars with jar lifter. Set jars aside to cool and seal. You just made caramelized onions and gravy.
Here is the video version:
Okra:
We love fried okra and pickled okra. For pickled okra, we use Ms. Wage's Kosher Quick Process seasoning packages. I follow the directions on the back of the package and make the brine solution. I choose the right size pods and wash them. I place the pods into the jars and pack kind of tight but not overcrowding. Then I ladle the brine into the jars, leaving a one inch head space. De-bubble, wipe rims of jars, place lids and bands on fingertip tight, and place in water bath canner. Fill water bath canner with water making sure jars are completely submerged. Bring to a rolling boil and process for around 10 minutes. After processing remove from canner using jar lifter and set aside to cool. Make sure they are sealed before storing them into pantry.
Freezing okra:
For these we picked out good size ones and washed and sliced up. We portioned them into meals and put them into vacuum seal bags and into the freezer. Easy peasy.
Here is the video version:
Pineapple:
Oh, I love me some pineapple. But sometimes I also want to go to my pantry and find a jar of canned pineapple. I watch for sales on these and grab some and bring them home and preserve them too. When picking pineapple, you want a rind that is turning yellow. The more yellow it is, the sweeter and riper it is.
Its time for processing. Fruits are high in acid so that means water bath process. You start by removing the stem with the green leaves. If it is a really ripe pineapple, you can just twist it and it should remove easily. If not, cut off using a sharp knife and create a flat top. Cut the bottom of the pineapple off and create a flat bottom so your pineapple want roll while cutting it. Start at the top and cut the rind off all the way to the bottom. Do this all the way around until all rind is removed. Cut pineapple in half and remove the core. If you can handle the toughness, by all means cut it up too. Save all your scraps and cores because we will be using those too. Cut your pineapple into chunks or you can leave in rings. I actually have a pineapple corer that makes this process so much easier. You cut the top off your pineapple, place your pineapple corer right over the core in the center and start twisting while pushing down. This cuts all the way down to the bottom of the pineapple and creates your rings while separating the core at the same time. Turn your pineapple on its side, grab the handle of the corer and pull out. You will have rings on the outside of the tube and the core should be inside the tube. Cut a slice down through all the pineapple rings and slide them off, or remove handle and slide rings off the tube. Remove the core from inside the tube. It did all the work for you. Now proceed to cutting your pineapple.
Fill your jars up to the neck with pineapple. If you are canning rings, you might need a wide mouth jar to fit them in. It depends on how sweet your pineapple is as to whether or not you will need to add a sweetner to your water. If my pineapple is really sweet, I just add water to the jar up to the neck leaving a one inch headspace. If your pineapple is not as sweet as you'd like, you can make a simple syrup of water and sweetner and pour into jar. De-bubble, wipe rims of the jar, place lids and bands on fingertip tight and place into water bath canner. Fill canner with water making sure jars are completely submerged and water is over the lids. Bring to a rolling boil and process for 20 minutes for quarts. After processing, remove jars from canner with jar lifter and set aside to cool and seal.
Pineapple Scraps:
Now, all those wonderful scraps are going to be turned into something. You can regrow a pineapple by rooting and planting the stem of the pineapple. Be sure to research on how to do this properly.
Break down the rinds into sections that will fit into a pot. If you did not use your core, throw those into the pot with the rinds. Pour water into the pot making sure to cover the scraps completely. Let simmer on the stove for several hours or you can do a quick boil for 45 minutes to an hour to draw out more juice from the scraps. After simmering, strain the scraps and reserve the juice into another pot. At this point you can do so many things with the juice. You can make jelly by adding pectin and sugar, or just can the juice for drinking or mixing in with teas or smoothies. You can use the juice as a marinade. I chose to make a syrup for smoothies, pancakes, waffles, ice cream and such. You need equal parts juice to sweetner. ( 5 cups juice = 5 cups sweetner). Put pot of juice back on the stove and add your sweetner. Add a splash of lemon juice for the acidity that you need for fruits when water bathing. Bring to a boil and then simmer until syrup thickens.
After syrup has thickened, remove pot from the stove. Ladle syrup into the jars up to the neck. Wipe rims of jars and place lids and bands on fingertip tight. Place jars into water bath canner and add water making sure to cover jars completely. Bring to a rolling boil and process for 10 or so minutes, long enough to seal the jars. Remove jars from canner with jar lifter and set aside to cool. Make sure all jars seal before storing in your pantry. You just made syrup.
You can toss the scraps outside to the wildlife or into your garden as compost. You can also use the scraps to make a homemade natural vinegar cleaner. Take some of the scraps and put into a jar, add vinegar up to the neck of the jar, and put lid on. Let sit in a cool dry place for about a week or two. When it is time to make your cleaner, take a 1/4 cup of the vinegar and pour into a big spray bottle and then add water to dilute the vinegar. Bam! You have an all natural cleaner. When you have emptied the jar of vinegar with the scraps in it, you can add more vinegar and repeat process but probably only about one more time. You can do this with orange, lemon, lime, and grapefruit peels as well.
So many uses from a $2 pineapple.
Here is a video version:
Peaches:
Peaches are another fruity goodness that I love to have on hand to just pop open a jar and eat straight out of the jar. And you can. Here's how. Peel, core and slice your peaches. Save those scraps, you can use them. Place peaches in your jar up to the neck, add water up to the neck of the jar also, leaving a one inch headspace. De-bubble, wipe rims of the jars, place lids and bands on fingertip tight. Place in water bath canner and add water to the canner making sure to cover the jars completely. Bring to a rolling boil and process for 20 minutes for quarts. Remove jars with jar lifter and set aside to cool. Look at that color.
Now, for the scraps. Put them into a pot and cover with water and simmer for several hours to draw out more juice. Strain the scraps over another pot and reserve juice. Now you have juice that you can turn into jelly, syrup or just keep as juice to drink or put in teas. Use the same process as I did for the pineapple scrap juice as mentioned. You can basically use the peach scraps and peelings in the same way as I mentioned in the Apple section above. You an also dehydrate the peach skins and run them through a food processor or blender and make a powder for flavoring smoothies, oatmeal, cobblers, muffins, yogurts, coffee, tea etc. You can use as a facial scrub by pouring equal parts powder and regular sugar and just enough water to make a thick paste. Add some essential oils and use as a nightly self care regiment. You can bake the peels and eat them.
Strawberry Tops:
I even found something I can do with those strawberry tops instead of tossing them into the trash. Use them to make a vinegerette. You can see it here.
Eggs:
I love to preserve eggs also. I have seen people can eggs and there is a method of water glassing eggs too, which I have not tried, yet. But give me time, I probably will. The old timers used this method. We freeze eggs and I love to pickle them. I have even done a quick pickle method by boiling eggs, peeling and putting them into a jar of left over store bought pickle juice. Let them sit for up to 7 days and then tasted them. Yummy quick snacks or to use in egg salad sandwiches, deviled eggs, or potato salads.
For freezing eggs, I crack open a bunch of eggs into a bowl and whisk until well combined. I will pour egg mixture into an ice cube tray, place in freezer and freeze. Just like ice cubes. Now, you have egg cubes. After frozen, I pop out of the ice cube trays carefully so I do not to break the cubes. I place cubes into a Ziploc bag and place back into the freezer. One cube is equivalent to one medium egg. Take out one or two as needed and let thaw. They are better scrambled or used in baking when done this way. You can freeze them in an airtight container or Ziploc bag and cook or scramble a whole bunch at one time. Perfect for omelets.
For pickling: You know what I used. You guessed it, Ms. Wage's Kosher Dill Quick Process seasoning packages. Why not? It worked so well for everything else I pickled. I did use another recipe one time before, but it was a little too mustardy taste for me.
I boiled my eggs, let them cool, then carefully peeled them. You don't really want a tear or crack. I packed my jars with the peeled eggs kind of tight but not overcrowding. You want the brine to cover each egg completely. I prepared the brine according to the package directions. I ladled the brine into the jars leaving a one inch head space. It will be hard to de-bubble the eggs because you don't want to puncture them, but make sure there are no air bubbles in the jar. Wipe rims, place lids and bands on fingertip tight and place into water bath canner. Cover jars completely with water making sure to go above and over the lids. Bring to a rolling boil and process for about 10 minutes. Long enough to seal the jars. After processing, remove from the water bath canner with jar lifter and set aside to cool. Check jars to make sure they are sealed before you store in your pantry. You can do a small batch and just place in the refrigerator if you don't want to water bath for longer shelf life.
Here is the video:
Here is the way I use our eggs that have been frozen:
Cheeses:
We love cheese in this house and so we process it too. We prefer the block cheese over the already packaged because of the starch that is used for preservation. So when they go on sale we go buy a bunch and bring it home. We take it out of the packages, cut into long cubes so that they will go through the chute of the shredder attachment of my Kitchen Aid. We flash freeze long enough to harden it up so it will shred easier. If cheese is shredded at room temp in this attachment, it mixes with the heat of the shredder and it gums the cheese up and will not shred as well. After it is chilled or flash frozen, I run it through the shredder, portion into 1 cup servings, put in Ziploc bags, close up, and put in the freezer. Cheese does not last long in our home. lol
Here is a video version:
Butternut Squash:
This vegetable is so versatile and can be used in so many ways for so many dishes. You can freeze them, or can them. They are so easy to grow. The hardest part of preserving these is when you get ready to cut them up. They are awkward in shape which makes them harder. However, once you find the way you want to cut them and get into a flow, it goes by pretty fast.
I found a way to cut them that was easy for me. First , I cut the ends off where you have a flat bottom and top so it want roll with you. I start at the top and slice down, with the grain and cut in half. Then I scoop out the seeds. If I am roasting some for puree, this is where I would leave the skins on, turn flesh down onto a lined baking sheet with aluminum foil, roast in the oven at 375 or 400 degrees until soft and skins are wrinkly. This makes the skins easier to peel off. I remove them from the oven and let them cool completely so you can touch them. I peel the skins off and place flesh into a bowl. After a few minutes, water will collect at the bottom in the bowl. Drain water or you can put in a cheese cloth and hang over sink to let the water drain. After draining water, I take a potato masher and mash and stir up to make puree. You can also do this in a stand mixer. I then take a 1 cup measuring cup and put into a vacuum seal bag and vacuum seal bags with my vacuum sealer or you can use Ziploc bags. Flatten them out for easier storage in freezer.
Next is to cut them up into cubes to freeze or pressure can. After I cut them in half and scoop the seeds out, now I turn it over and grab the neck of the squash. I will take a vegetable peeler and peel down the neck to the rounded bottom. The rounded bottom is the hardest, but you peel going around the bottom not down. After all skin is removed, I cut the half where the neck meets the round shape of the squash. It is easier to cut the neck into strips then into cubes. The bowl part, I can cut into wedges and have wedged fries. Or I can keep cutting them down into cubes. You can actually leave the necks into strips and use as French fry wedges. After I get them all broke down, I decide what will get frozen and what will get pressure canned. The wedges will get put into vacuum seal bags and vacuumed sealed and put into freezer. I can also freeze some that are cubed up and do them the same way. Then I will can some that are cubed up. This is where I get creative. I can can some in water, vegetable stock or a simple syrup of brown sugar, syrup and water. Or I can dry pack them (no water in the jars). I can have a variety on hand at a moments notice for a meal.
For the ones that I am canning, I pack raw cubes into jars, fill the jars up to the neck with water (or whatever I want to can them in), de-bubble, wipe rims of jars, place lids and bands on finger tip tight and place into pressure canner. I process quarts for 90 minutes at 10 lbs. pressure. Check the lbs. per pressure for your altitude.
However you cut your squash is how many different ways you can use them. For example, If I cut some of the squash into strips I use as French fries. If I cut into cubes, I can roast them on sheet pan dinners, throw into roasts, stews, soups, etc. I can boil or bake the cubes and still have mashed squash. The puree can also be a substitute in pumpkin pie. Yes, in the depression era cooking days they would do this if they did not have pumpkins. I told you squash is so versatile and can be used in so many different ways and recipes. Butternut squash is a good substitute for Keto and Diabetic diets.
Here, you can watch the video version:
Pumpkins:
Pumpkins are another vegetable that are very versatile. We have grown both sizes, the pie pumpkin and the carving pumpkin ones. To be honest, there is no taste difference for me because it is the spices you put in it to make the pie anyway. I would rather grow the big ones and get more bang for our buck. Hence, the larger the pumpkin, the more you get.
They are not just for pumpkin pies. You can also use them as a vegetable as a side dish or soup, depends on how you put it up. Pumpkins are in the squash family, so therefore, you can also treat them as such. You can freeze them and pressure can them in cubes too. You can roast them and season any way you want to like with olive oil, salt pepper, Italian seasonings etc. You can mash them like potatoes and they could be a substitute in Keto and Diabetic diets. You can cut them into wedges and make pumpkin fries out of them. You can puree and make soups. I plan to do just that.
The first way I preserve some is by roasting and making puree to put into pumpkin pies, breads, muffins, donuts, waffles and pancakes.
It all starts with breaking down the pumpkin which is really easier than breaking down a butternut squash.
Dear hubby breaks down the really large ones for me seeings though I am short. He lets me break down the little ones.
Let's start with roasting first, it's easier. You cut around the stem and punch it down to the inside. Take your knife and cut the whole pumpkin in half down the center. Separate. Scoop out the seeds from both halves, place flesh side down onto a lined baking dish, rub a little oil on the skin to keep it from burning, place in the oven and roast on 375 or 400 degrees until the skins are wrinkly. Remove from oven, let cool completely.
After they have cooled and you can touch them, peel skins off, put flesh into a bowl, drain the water out, mash with a potato masher and puree. You can also do this in a stand mixer. I like to portion my puree into 2 cup portions into a vacuum seal bag and vacuum seal them. You most certainly can use a Ziploc bag. Then flatten so they will store better in your freezer and save space.
Now let's talk about canning them or freezing them.
I will take some of the broken down wedges and remove the peelings. I did this two different ways. One, I used a vegetable peeler to scrape the peelings off, the other way, I used a knife like I was removing watermelon from a rind. Then I took those wedges and started cutting them up into 1 inch cubes. I packed the cubes into the jars leaving a one inch headspace, filled the jar with water, de-bubbled, wiped jar rims off, placed lids and bands on, and processed in the pressure cooker for 90 minutes at 10 lbs. pressure. You can substitute water for broth or simple syrup in the jars. You can also dry pack them.
For freezing, I will start cutting the wedges into one inch cubes and portion them into vacuum seal bags, vacuum seal and place in freezer.
Here is the video version
I have also processed pumpkin to puree and have on hand to use in dishes. This video I show you how I cut a pumpkin, roast it and prep it to make a homemade pumpkin pie. It was delicious. It is easier to cut a pumpkin open, lay flat on a baking sheet and bake until tender. The skin pulls off so much easier. You can watch it here:
Pickled Vegetables:
I found another way to get vegetables into kids. My grandkids love my zucchini pickles and pickled okra so much that they asked me if I could do some vegetables. Of course I can. We saw some in the grocery store one time and I picked up a jar. We tried them, we liked them, but they just knew we could do it ourselves so we gave it a shot. This is a very easy and quick process. Pick out all the vegetables you like. We chose cauliflower, radishes, carrots, celery and snackable peppers. Wash, and cut up all your vegetables to the desired cubes, slices or chunks that you want. Place cut up vegetables into the jars by layering or shaking them up as you go, up to the neck of the jar. For the brine, I always use Ms. Wage's Quick Process Pickling Spices or Kosher Dill packets. This is the best flavor brine that my grandkids enjoy so they are my go to staple for pickling. I follow the directions on the package and get my brine ready and start boiling. Heat up some water in your water bath canner. After the brine has boiled for the amount of time specified on the back of the package, remove from heat and create your work space. Using a ladle and funnel, fill your jars with the brine up to the neck of the jar. Debubble the contents of the jar to remove any air pockets. Wipe the rims of the jars with a wet cloth. Place lids and bands on and screw on finger-tip tight. Place jars into the water bath canner gently. Fill the canner with more water being sure to cover jars completely. Bring to a rolling boil and process for 20 to 30 minutes according to how firm you want your vegetables. Remove from canner gently and place on a counter to cool. You should start hearing those pops letting you know they are sealed. I would let them sit at least for 7 days before opening a jar. The longer they set, the better the flavor. Enjoy!
Video Version:
Preserving Herbs:
Aha! I bet you didn't think of this one.
We grow our herbs in my Aero-Garden. It is a hydroponics water system to grow herbs and many other things. If that caught your attention and you are interested, here are two videos I put together walking you through what it is, how it works, how to set one up, and how to care for yours.
Now, how do I go about preserving them? I'll be glad to tell you how. You can also use these same methods of preservation on greens like spinach, kale, celery leaves, carrott top leaves, radish leaves etc. Don't let those greens go to waste.
The first way is by picking whatever I want and putting them onto a baking sheet and let them air dry, turning every few days. When they are completely dry, I crunch them up or run them through a coffee grinder. I then take a bottle with a lid and place the dried herb into the bottle and label it. Any bottle or jar will do, as long as it has a lid that seals. You could even use a small plastic bowl with a locking lid. Bam! long shelf life.
Method number two is to pick some leaves from the one herb of your choice or you can make a blend of herbs, place into a food processor and add salt. I'm not talking about a sprinkle of salt, I'm talking about the same amount of salt as herbs. Pulse them together until the herbs are finely chopped and mixed into the salt. Place in air tight containers with a locking lid and place in the refrigerator since these are fresh herbs and not dried. Use as a regular salt when cooking. The cool thing is, you can use those little leafy ends of celery and you can use carrot tops too to do this. I am so sorry, I forgot to get a picture. But trust me, it tastes so good. I used it in soups, stews, etc.
Method number three is to take leaves and place in the cells of ice cube trays, with an oil or butter (melted) of your choosing. Place ice cube trays in the freezer until fully frozen. Remove from freezer, pop cubes out into a Ziploc bag for storage. Take out a cube as needed to cook with. It melts just fine in the pan with your dish. I will take mint leaves and freeze them in the trays with water or juice to make mint ice cold tea, or smoothies.
Method four: take a stick of butter and mix with any finely chopped herb. After it is good and well combined, place into an air tight container and store in the refrigerator since you are using a fresh herb.
Method five: take stems of herbs with their leaves still in tact and place into a jar, fill up to the rim with an oil of your choice. Put lid on and store in a dark cool place and use when cooking. You will need to use these quicker because fresh herbs in oil can go rancid. You can choose to dry the herb first then fill with oil, it will last longer. Do not refrigerate or the oil will solidify.
Method six, you can make pesto which I have not tried yet, but trust me, I will.
You can watch the full video here:
If you want to know how I use all our preserved produce and meats, I have a video where I take you on a freezer tour and show you our freezers and what all is in them and I give you ideas on how to use them in recipes. Same goes with a video on our pantry tour.
You can watch them here:
Be sure to check out our YouTube channel for some of my canning videos and content
4D Farms LLC. is a participant in the Amazon Services LLC Associates
Program. Our storefront link is an affiliate link that earns our farm a
commission at no additional cost to you , if you click through and make a
purchase. You can trust that we recommend products that we use in our own home
and love and maybe some we wish to have. Our storefront is designed to help you
locate items easily by specific organized and titled lists.


.jpg)


.jpg)


.jpg)


.jpg)
.jpg)


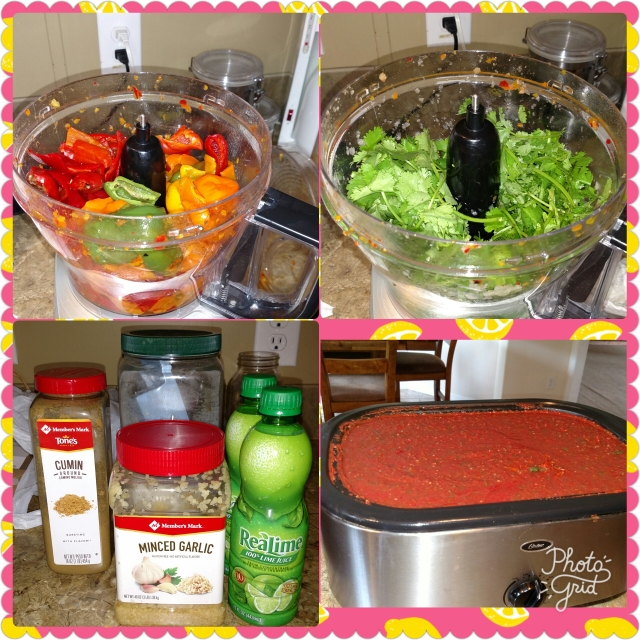


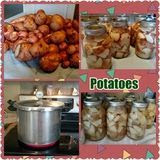

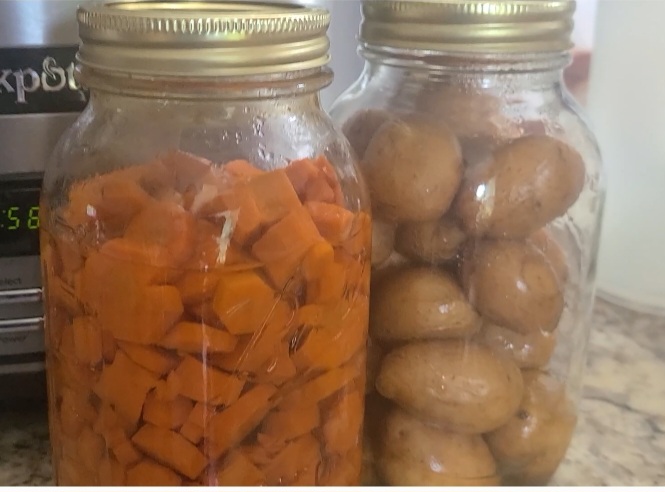


%20(1).jpg)


No comments:
Post a Comment